


How to Apply UV DTF Stickers: Step-by-Step Guide

Table of Contents
- What You'll Need Before You Start
- Preparing Your Surface for UV DTF Application
- Step-by-Step: How to Apply UV DTF Stickers
- Best Surfaces for UV DTF Decals
- Troubleshooting UV DTF Application Errors
- UV DTF Transfer Durability and Aftercare
- Removal and Repositioning Your Stickers
- Common Mistakes to Avoid
Last Updated: August 24, 2026
What You'll Need Before You Start
UV DTF sticker application requires specific tools and materials. Start with the transfer itself: UV DTF gang sheets come pre-printed with designs on a carrier sheet. The BB5wholesale UV DTF gang sheet (£3.95) provides multiple designs on a single sheet, maximising efficiency. You'll also need a squeegee (a hard plastic tool with a flat edge for even pressure), isopropyl alcohol or surface cleaner, and lint-free cloths. Gather a ruler for alignment and a heat source if your substrate requires curing.
Preparing Your Surface for UV DTF Application
Surface preparation separates successful applications from failed ones. Start by wiping the entire surface with isopropyl alcohol on a lint-free cloth using firm, circular motions to break down contaminants. Let the alcohol dry completely, typically 30-60 seconds ([EXTERNAL_LINK: guidance on disinfectant drying times | cdc.gov]). For stubborn residue, a second pass with fresh alcohol helps.
Inspect the surface under good lighting. Run your finger across it, it should feel smooth and slightly tacky, not slippery or dusty. If you feel any resistance or see particles, clean again.
Temperature matters. If your workspace is below 15°C, allow the substrate to reach room temperature before applying your transfer. This ensures the adhesive sets properly and creates stronger long-term durability.
Step-by-Step: How to Apply UV DTF Stickers
Step 1: Dry-Fit Your Design
Position the transfer on your surface without applying pressure to verify alignment, scale, and placement. Peel back one corner of the carrier sheet slightly to see the design underneath. For cylindrical surfaces like cups or tumblers, ensure the design sits at the correct height and wraps appropriately around the curve. Take a step back and assess placement visually. For batch production, mark reference points on your work surface so every item receives the transfer at the same position.
Step 2: Peel and Position the Transfer
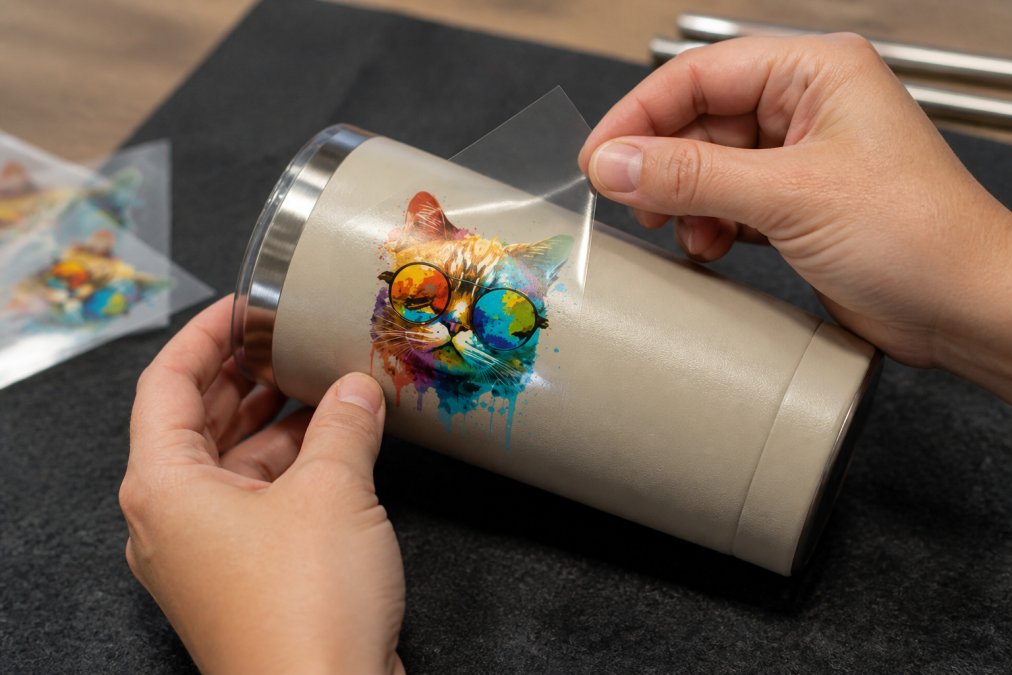
The UV DTF transfer arrives as three layers: the carrier sheet (bottom), the adhesive layer with your design (middle), and the transfer film (top). Carefully peel back the transfer film at a 45-degree angle to expose the design and adhesive side. Move slowly to avoid tearing or wrinkling.
Position the exposed adhesive side onto your clean substrate, starting at one edge and gradually lowering the transfer toward the opposite edge. This "hinged application" prevents air bubbles from getting trapped underneath. Align the design precisely using your dry-fit reference points.
Step 3: Apply Pressure with Your Squeegee
Place the squeegee flat against the transfer film at one corner and apply steady, moderate pressure. Use long, overlapping strokes working from the centre outward toward the edges. Cover the entire transfer area with 3-5 passes, with each stroke overlapping the previous one by roughly 50%.
Pay particular attention to edges and corners, which are prone to lifting if pressure is insufficient. For cylindrical items like cups or tumblers, wrap your hand around the item and press the squeegee firmly as you rotate it to maintain even pressure across curved surfaces.
Step 4: Remove the Carrier Sheet
Lift one corner of the carrier sheet at a 45-degree angle and pull slowly. If the transfer stays on the substrate while the carrier sheet peels away cleanly, you've achieved good adhesion. If the design starts to lift with the carrier sheet, stop immediately and apply more pressure with your squeegee before trying again.
Step 5: Peel Away the Transfer Film
Lift one corner of the transfer film at a 45-degree angle and pull slowly and steadily. The design should remain on the substrate while the transfer film peels away cleanly. If the design starts to lift with the transfer film, you haven't achieved full adhesion, stop, reposition the transfer film, and apply more pressure with your squeegee.
Best Surfaces for UV DTF Decals
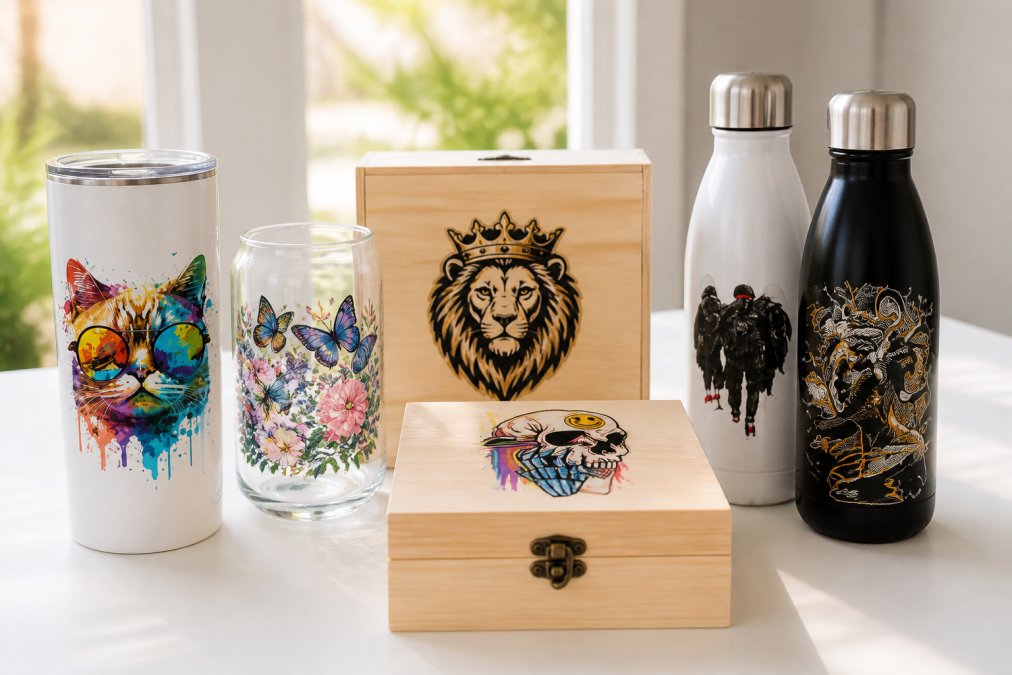
UV DTF transfers excel on hard surfaces where traditional fabric DTF transfers don't work. Glass and ceramic are ideal, tumblers, mugs, and drinkware hold UV DTF transfers exceptionally well and withstand hundreds of wash cycles without peeling.
Wood accepts UV DTF transfers effectively, though surface preparation is critical. Smooth, sealed wood works best. Sand the surface lightly before cleaning with isopropyl alcohol to improve adhesion.
Metal surfaces (aluminium, stainless steel, and powder-coated finishes) provide excellent adhesion. Hard plastic, acrylic, and polycarbonate work well for UV DTF transfers. Ensure the plastic surface is clean and slightly roughened if very smooth.
Finished leather can accept UV DTF transfers if the surface is clean and free from oils. Avoid porous or highly textured surfaces like fabric, unfinished wood, and rough concrete, these won't hold UV DTF transfers reliably.
Test new substrates with a sample transfer before committing to production.
Troubleshooting UV DTF Application Errors
Air bubbles trapped under the transfer happen when the transfer isn't positioned smoothly or pressure is uneven. Use the hinged application method and apply consistent pressure with multiple squeegee passes. If bubbles appear after application, try heating the area gently with a heat gun set to low.
Peeling at edges or corners indicates insufficient pressure during application. Fix this by reapplying the transfer film and using your squeegee with extra pressure around the edges.
Incomplete adhesion across the entire transfer usually means the substrate wasn't clean. Remove the transfer carefully, clean the substrate thoroughly with isopropyl alcohol, and reapply.
Transfer film tearing during removal suggests you're peeling too quickly or at too steep an angle. Peel at 45 degrees and move slowly.
Design fading or discolouration after application indicates either a substrate issue or a transfer quality problem. Always source transfers from reputable suppliers like BB5wholesale to ensure colour stability.
UV DTF Transfer Durability and Aftercare
Properly applied UV DTF transfers last hundreds of wash cycles and years of regular use ([EXTERNAL_LINK: research on adhesive durability | ncbi.nlm.nih.gov]). For drinkware, hand washing is preferable to dishwashers, though many transfers survive dishwasher cycles. Avoid abrasive scrubbing directly over the design.
Most UV DTF transfers handle warm liquids without issue. Extreme heat can degrade the adhesive over time. UV exposure affects long-term durability, prolonged outdoor exposure can cause fading, while items used indoors maintain colour significantly longer.
Keep transfers away from extreme heat and direct sunlight when not in use. Avoid prolonged soaking or submersion, as constant moisture can eventually weaken the adhesive bond.
Removal and Repositioning Your Stickers
Heat is your primary tool for removal. A heat gun set to medium heat or a hair dryer on high will soften the adhesive. Hold the heat source a few inches from the transfer and warm it for 30-45 seconds. Once warm, gently lift one corner with your fingernail or plastic scraper and work slowly.
After removing the transfer, any remaining adhesive residue can be wiped away with isopropyl alcohol. Repositioning an existing transfer is challenging because the adhesive degrades after initial application. It's usually better to discard the old transfer and apply a new one.
Common Mistakes to Avoid
Skipping surface cleaning is the most costly mistake. Thirty seconds of cleaning prevents 90% of adhesion problems.
Applying insufficient pressure is the second most common error. UV DTF transfers are durable and require firm, consistent pressure to bond properly. Use multiple squeegee passes and don't hesitate to press hard.
Peeling too quickly creates bubbles and incomplete adhesion. Slow, controlled peeling is always better than rushing.
Using dirty or damaged squeegees reduces pressure effectiveness. Clean your squeegee between applications and replace it if the edge becomes worn or chipped.
Applying transfers to incompatible surfaces wastes materials. Test new substrates with a sample transfer before committing to production.
Storing transfers improperly before application can degrade adhesive performance. Keep transfers in cool, dry conditions away from direct sunlight.
Applying transfers in cold conditions (below 15°C) compromises adhesion. Allow substrates and work areas to reach room temperature before applying transfers.
UV DTF transfers offer a reliable way to add durable, vibrant designs to hard surfaces. The application process is straightforward: clean the substrate thoroughly, position carefully, apply firm pressure, and peel methodically. BB5wholesale's UV DTF gang sheets (£3.95 per sheet) provide multiple designs on a single sheet, making batch production efficient and cost-effective. Whether you're personalising tumblers, creating promotional merchandise, or adding custom branding to hard goods, mastering these techniques ensures consistent, professional results. Upload your gang sheet with the BB5wholesale gang sheet builder and start producing transfers that last.
Frequently Asked Questions
Does UV DTF need heat to apply?
No, UV DTF stickers do not require heat to apply. Unlike traditional DTF transfers for fabric, UV DTF uses permanent adhesive that bonds to hard surfaces at room temperature. You simply position the transfer, apply pressure with a squeegee, and peel away the carrier sheet. No heat press or curing oven is needed, making UV DTF faster and more accessible for small businesses and home setups.
What surfaces work best for UV DTF decals?
UV DTF decals work on any hard, non-porous surface. Glass, ceramic, plastic, metal, wood, acrylic, and leather all accept UV DTF transfers well. Avoid soft, fabric surfaces, those require traditional DTF. For best results, ensure your surface is clean, dry, and free from dust or oils. Smooth, flat surfaces produce sharper adhesion than heavily textured ones.
How do I remove air bubbles when applying UV DTF stickers?
Start by dry-fitting your design to check alignment before fully committing. Once positioned, use a squeegee with firm, even pressure, working from the centre outward in a single direction. This pushes air bubbles toward the edges as you go. If bubbles remain after peeling the carrier sheet, use a fine needle to puncture small bubbles and press flat with the squeegee. For larger areas, lift and reposition carefully, then re-squeegee.
Are UV DTF stickers permanent and long-lasting?
Yes, UV DTF stickers are designed for durability. The permanent adhesive creates strong bonds with hard surfaces, and the UV-cured design resists scratching and fading. With proper application and care, hand washing only, avoiding abrasive scrubbing, UV DTF transfers last months to years depending on use. BB5wholesale's premium gang sheets are engineered for scratch resistance and waterproof performance, making them ideal for drinkware, tumblers, and outdoor branding.
This article was written using GrandRanker