


UV DTF Printing for Beginners: A Step-by-Step Guide

Table of Contents
- What is UV DTF Printing?
- Equipment and Materials You'll Need
- How the UV DTF Process Works
- Step-by-Step UV DTF Printing Guide
- UV DTF Transfer Application Process
- Using a UV DTF Gang Sheet Builder
- Alternatives to UV DTF for Promotional Merchandise
- Common Mistakes to Avoid
Last Updated: August 25, 2026
What is UV DTF Printing?
UV DTF printing is a direct-to-film technology that creates durable, vibrant transfers for hard surfaces like glass, wood, metal, acrylic, and leather. Unlike traditional DTF transfers designed for fabric, UV DTF uses UV-curable ink and specialised transfer film that bonds permanently to rigid substrates through a curing process.
The process combines CMYK colour printing with a white ink layer beneath the colour to provide opacity and vibrancy on transparent or dark surfaces. Once printed, the design is exposed to UV light, which hardens the ink and creates a scratch-resistant finish. This makes UV DTF ideal for promotional merchandise, custom stickers, branded hard goods, and personalised items.
UV DTF differs from direct UV printing because it uses an intermediate film layer, offering flexibility: you print designs in advance, then apply them as needed. For small businesses and Etsy sellers, this efficiency is transformative.
Equipment and Materials You'll Need
Creating UV DTF transfers requires specific hardware and consumables. The right setup determines print quality, efficiency, and production speed.
Essential Hardware
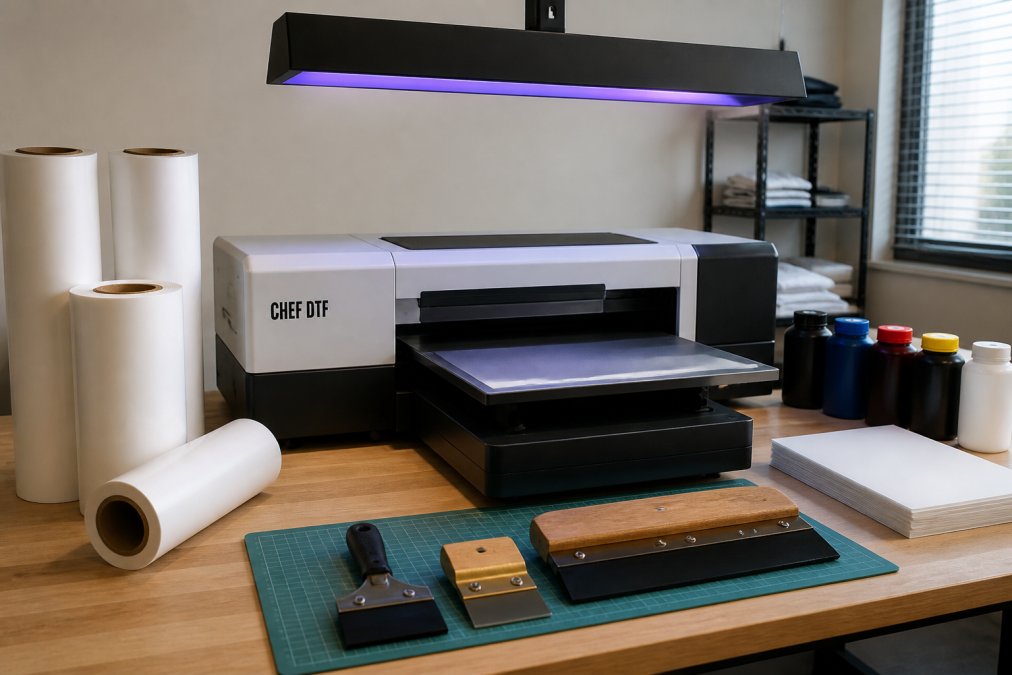
A UV DTF printer is the centrepiece of your operation. These modified inkjet systems handle transfer film and UV-curable inks, typically in 30cm, 45cm, or 60cm roll widths.
A UV curing lamp exposes printed transfer film to ultraviolet light, hardening the ink instantly. Most setups use LED UV lamps rated between 365-405 nanometres wavelength, with exposure time typically ranging from 3-8 seconds depending on ink density and lamp power.
A heat press or manual applicator transfers designs onto hard surfaces. For rigid substrates, a heat press applies controlled temperature and pressure simultaneously, ensuring strong adhesion.
RIP (Raster Image Processor) software converts design files into printer-ready output, managing colour profiles, gang sheet layout, and print head alignment.
Consumables and Supplies
Transfer film is your primary consumable. UV DTF transfer film has a special adhesive layer designed to bond with hard surfaces. Premium film offers better adhesion and colour vibrancy. At BB5wholesale, our UV DTF gang sheets are engineered for vibrant colour and scratch-resistant durability across hard surfaces.
UV-curable ink is formulated differently from standard DTF ink. It contains photoinitiators that trigger polymerisation when exposed to UV light. You'll need CMYK inks plus white ink for opacity.
Isopropyl alcohol is critical for maintenance, preventing nozzle clogs that cause banding or colour dropout. Additional supplies include squeegee tools, lint-free cloths, and surface preparation solutions.
How the UV DTF Process Works
Your design file is imported into RIP software, which converts it into printer-ready output, managing colour separation and arranging multiple designs on a gang sheet to maximise efficiency.
Transfer film feeds through your UV DTF printer. The print head deposits CMYK inks in precise layers, with white ink providing the opacity foundation. Print resolution typically ranges from 720 to 1440 DPI.
Immediately after printing, the transfer moves under your UV curing lamp. The UV light hardens the ink within seconds, preventing ink migration and ensuring crisp colour boundaries. The cured transfer is now ready for application.
When applying the transfer, you peel it from the backing film and position it on your target surface. The adhesive layer bonds the transfer to glass, wood, metal, or acrylic. For best results, apply heat and pressure using a heat press set to 60-80°C for 10-15 seconds.
Step-by-Step UV DTF Printing Guide
Step 1: Prepare Your Design File
Start with a high-resolution design file at least 300 DPI if printing at actual size. Vector files (AI, EPS, SVG) are ideal because they scale without quality loss. Check your colour mode, your design should be in RGB or CMYK depending on your RIP software's requirements.
Consider the white ink layer. If your design has areas that should appear opaque, those areas need white ink coverage. Save your file in a format your RIP software accepts, typically TIFF, PSD, or PDF.
Step 2: Arrange Your Gang Sheet
A gang sheet combines multiple designs on a single piece of transfer film, maximising material usage and production efficiency. Your RIP software arranges designs with precise spacing.
Leave at least 1-2cm margins around the entire sheet and 0.5cm between individual designs. BB5wholesale's UV DTF gang sheet builder simplifies this process by automatically arranging designs, managing spacing, and generating print-ready files.
Step 3: Load Transfer Film and Print
Load your transfer film into the printer's feed mechanism, ensuring it's straight and fully seated. Check that the film width matches your printer's settings in the RIP software.
Set your printer to the correct media type and thickness. Most UV DTF transfer film is around 0.15-0.2mm thick. Run a nozzle check before printing and perform a cleaning cycle if you see gaps in the pattern.
Step 4: Cure the Print
Once printing completes, feed the film under your UV curing lamp positioned 2-5cm above the film surface. Move the film at a controlled speed, typically 1-2 metres per minute, to ensure complete exposure.
Most transfers cure in 3-8 seconds. If the ink feels sticky after curing, increase exposure time slightly. Allow the cured transfer to cool for 30 seconds before handling.
Step 5: Prepare Your Surface
Clean your target surface thoroughly. For glass, use a glass cleaner or isopropyl alcohol. For wood, wipe with a damp cloth and allow to dry completely. For metal, remove any rust or oxidation with a wire brush, then wipe clean. For acrylic, use isopropyl alcohol to remove dust and oils.
Dry the surface completely; moisture prevents proper adhesion.
Step 6: Apply the Transfer
Peel the cured transfer from its backing film carefully. Position the transfer on your prepared surface. If using a heat press, place the transfer design-side down on the substrate and close the press. Set temperature to 60-80°C and pressure to medium. Hold for 10-15 seconds.
For manual application using a squeegee, press the transfer onto the surface and use firm, even strokes to push out air bubbles, working from the centre outward.
Allow the transfer to cool and set for at least 30 minutes before handling. For maximum durability, wait 24 hours before washing or using the item.
UV DTF Transfer Application Process
Applying a UV DTF transfer correctly determines whether it lasts months or peels within days. Begin by ensuring your surface is completely clean and dry. Any dust, oil, or moisture creates weak points where the transfer will eventually separate. For high-value items, use isopropyl alcohol and a lint-free cloth, then allow 5 minutes for complete drying.
Position the transfer on your surface. For symmetric designs or precise placement, use a ruler or template to mark the correct position.
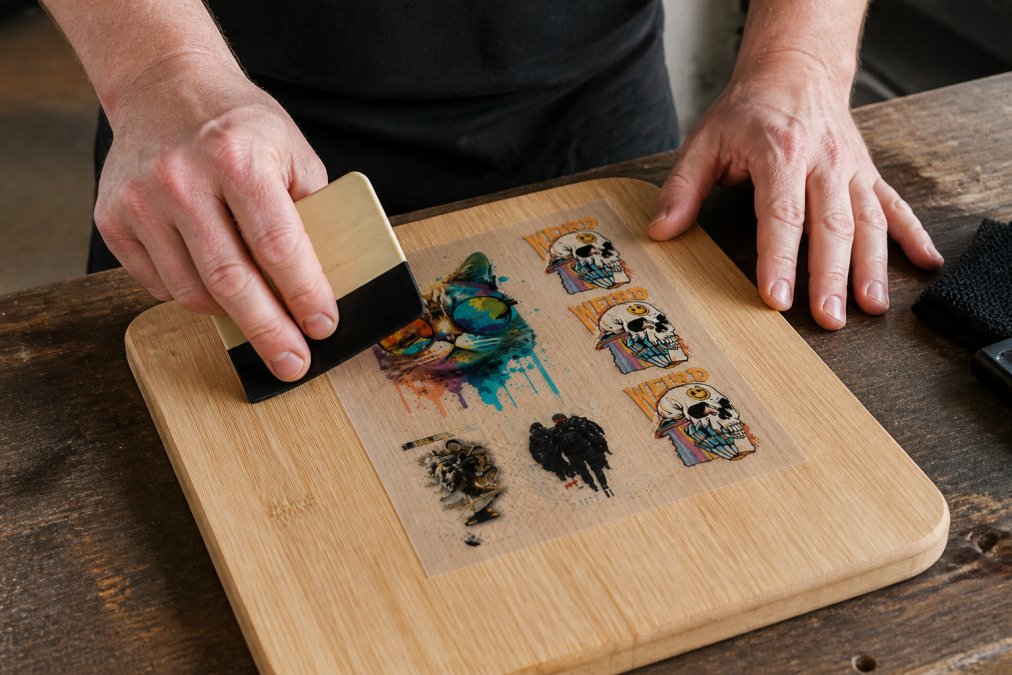
If using a heat press, set it to 60-80°C. Place the transfer design-side down on the substrate. Close the press and maintain medium pressure for 10-15 seconds. The heat activates the adhesive and creates a permanent bond.
For manual application, use a squeegee or hard plastic card. Press the transfer firmly onto the surface, starting at the centre, using overlapping strokes with consistent downward pressure, working outward toward the edges.
After application, allow the transfer to set for at least 30 minutes at room temperature. For items that will be washed or exposed to moisture, waiting 24 hours significantly improves durability.
Using a UV DTF Gang Sheet Builder
A gang sheet builder transforms your workflow from manual to automated. Instead of arranging designs in design software, the builder handles spacing, alignment, and file generation.
BB5wholesale's UV DTF gang sheet builder lets you upload multiple designs and automatically arranges them on a single sheet. You specify the film width and the builder optimises layout, maximising coverage whilst maintaining proper spacing. This eliminates wasted film and reduces setup time dramatically.
The builder generates a print-ready file in your RIP software's native format. The builder also tracks design history, allowing you to reprint popular designs without re-uploading files.
Alternatives to UV DTF for Promotional Merchandise
UV DTF is powerful, but it's not the only option for creating durable, customised hard surface merchandise.
Screen printing produces durable, vibrant results but requires high setup costs and is economical only for large runs (500+ units).
Vinyl decals offer simplicity and low cost but have a shorter lifespan than UV DTF transfers, typically 2-3 years before fading or peeling, compared to 5+ years for UV DTF.
Direct UV printing eliminates the transfer film entirely, producing exceptional detail and durability but requires expensive equipment and works only on flat, rigid surfaces.
Sublimation printing works only on polyester or specially coated substrates and cannot print on wood, metal, glass, or uncoated surfaces.
Laser engraving creates permanent marks by removing surface material but cannot produce full-colour designs.
UV DTF balances cost, speed, quality, and versatility. For most small businesses and custom merchandise producers, UV DTF is the optimal choice.
Common Mistakes to Avoid
Understanding frequent pitfalls helps you avoid costly errors and produce professional results consistently.
Skipping surface preparation is the most common mistake. Dirty, oily, or damp surfaces cause transfers to peel within days or weeks. Always clean surfaces with isopropyl alcohol and allow complete drying before application.
Incorrect heat press settings damage transfers or create weak adhesion. Test settings on sample transfers before processing customer orders.
Poor file preparation results in pixelated or colour-shifted prints. Always use 300 DPI resolution and verify colour mode before sending to print.
Inadequate white ink coverage produces transparent or faded designs on clear or dark substrates.
Rushing the curing process leaves ink tacky or incompletely hardened. Allow sufficient UV exposure time, typically 5-8 seconds depending on lamp power and ink density.
Applying transfers whilst still warm causes adhesive to set unevenly. Always allow transfers to cool for at least 30 seconds after curing.
Inconsistent squeegee pressure during manual application leaves air bubbles and weak adhesion points. Use steady, firm pressure and overlapping strokes.
Ready to simplify your UV DTF production? At BB5wholesale, we've designed our platform specifically for custom apparel creators and merchandise producers. Our UV DTF gang sheet builder eliminates manual layout work, saving hours per week. Our UV DTF gang sheets are engineered for vibrant colour and long-lasting adhesion across glass, wood, metal, acrylic, and leather.
Whether you're running a small Etsy shop or managing a print operation, we offer the tools, quality, and support you need. Upload your gang sheet today and experience the difference professional-grade UV DTF transfers make. With 24/7 customer support, secure payment options, and fast door-to-door delivery, we're here when you need us.
WCAG accessibility standards for design files
ISO standards for UV-curable ink systems
British Standards Institution guidance on adhesive materials
Frequently Asked Questions
Q: What do I need to start UV DTF printing?
A: You'll need a UV DTF printer, UV-curable ink, transfer film with adhesive backing, a UV curing lamp, a squeegee or application tool, and a RIP software for colour management. For surface preparation, keep isopropyl alcohol and lint-free cloths on hand. The specific equipment depends on your production volume and budget, but these core items are essential to produce scratch-resistant, durable transfers on hard surfaces like glass, wood, and metal.
Q: Can you use a standard DTF printer for UV DTF?
A: No. Standard DTF printers use water-based or solvent inks designed for fabric applications, not UV-curable inks. UV DTF requires a printer specifically equipped with UV-curable ink systems and a built-in or external UV curing lamp. Attempting to use regular DTF equipment will result in poor adhesion, durability issues, and transfers that won't cure properly on hard surfaces. You need dedicated UV DTF hardware to achieve professional results.
Q: How durable are UV DTF stickers on hard surfaces?
A: UV DTF transfers are highly durable when applied correctly. The UV-curable ink creates a strong bond with the adhesive layer, and the lamination process adds a protective scratch-resistant coating. These transfers can withstand outdoor exposure, moisture, and frequent handling without peeling or fading. Long-term durability depends on proper surface preparation, correct curing time, adequate transfer pressure, and appropriate transfer temperature during application.
Q: What surfaces can UV DTF transfers be applied to?
A: UV DTF transfers work on most hard surfaces, including glass, wood, metal, hard plastic, acrylic, leather, and ceramic. The key is proper surface preparation: clean the substrate with isopropyl alcohol to remove dust and oils, then apply the transfer with consistent pressure. The peel-and-stick design makes application straightforward. However, porous or textured surfaces may require additional adhesive or pressure to ensure the transfer adheres properly and remains durable long-term.
This article was written using GrandRanker