


How to Prepare Artwork for DTF: A Complete Guide

Table of Contents
- Understanding DTF Printing and Artwork Requirements
- DTF Printing Resolution Requirements and DPI Standards
- Best File Format for DTF and Export Settings
- How to Remove Background for DTF Artwork
- Handling Transparency, Fine Details, and Hairlines
- Colour Management and ICC Profile Implementation
- DTF Artwork Checklist: Pre-Submission Quality Control
- Scaling, Sizing, and Artboard Setup for DTF Gang Sheets
Last Updated: August 13, 2026
Understanding DTF Printing and Artwork Requirements
Direct-to-Film (DTF) printing enables high-quality designs to transfer directly onto garments with exceptional durability and colour vibrancy. DTF combines white ink underbase layering with full-colour CMYK printing, requiring artwork prepared to specific technical standards. Your design must be print-ready upon upload, there's little room for post-production corrections once production begins.
The most common mistake is treating DTF artwork the same as screen printing or standard digital printing. DTF has unique requirements around resolution, colour management, and file format that differ significantly from other methods.
DTF Printing Resolution Requirements and DPI Standards
300 DPI (dots per inch) is the industry standard for DTF artwork, and this is non-negotiable for professional results. This resolution ensures sharp edges, vibrant colours, and fine detail reproduction. Anything below 300 DPI will result in visible pixelation, soft edges, and loss of detail.
Screen resolution (72-96 DPI) is optimised for monitor display, not physical printing. DTF transfers are viewed in direct sunlight and close proximity, making any resolution shortcomings immediately apparent. A design that's 1000 pixels wide at 72 DPI will be roughly 350mm at 300 DPI.
For gang sheets, each individual design should maintain 300 DPI. Ensure all artworks are at the same resolution before assembly.
Best File Format for DTF and Export Settings
PNG is the preferred file format for DTF artwork because it preserves transparency and supports lossless compression without quality degradation. PDF is acceptable for gang sheets and multi-design layouts, particularly when positioning multiple artworks precisely on the transfer sheet.
Raster vs. Vector Workflow for DTF
Vector artwork is infinitely scalable and produces crisp, solid edges without pixelation, making it ideal for logos, text, and graphic elements. Raster artwork consists of pixels and has a fixed resolution, but it excels at photorealistic images, gradients, and complex colour transitions.
Most DTF designs use a hybrid approach: vector elements for clean graphics and text, combined with raster elements for photographic imagery. Vector files (AI, EPS, SVG) must be rasterized before DTF submission at 300 DPI and RGB colour mode. Raster files (PSD, TIFF, PNG) are ready for DTF once they meet resolution and colour requirements, but cannot be enlarged without quality loss.
Start with vector whenever possible using Illustrator, Corel Draw, or similar software for logos, text, and graphic elements. Import raster images only when you need photorealistic detail. This workflow gives you maximum flexibility and ensures professional output.
Colour Mode: CMYK vs RGB for Print-Ready Files
RGB (Red, Green, Blue) is the correct colour mode for DTF artwork. DTF printers use RGB colour data and convert it to their own CMYK separation internally. Submitting CMYK artwork forces an unnecessary colour conversion that can introduce colour shifts and reduce vibrancy.
RGB has a wider colour gamut than CMYK, preserving the full colour range your design can express. The DTF printer's colour management system then optimises those RGB values for their specific equipment and inks.
When you export artwork from design software, explicitly select RGB mode in your export settings. In Photoshop, check Image > Mode to confirm you're in RGB before exporting. In Illustrator, go to File > Document Colour Mode and select RGB.
How to Remove Background for DTF Artwork
Background removal creates transparency, which allows your design to print cleanly on any garment colour without a solid rectangular box around your artwork. Transparent backgrounds are essential for professional DTF transfers because they adapt to the garment underneath rather than imposing a fixed background colour.
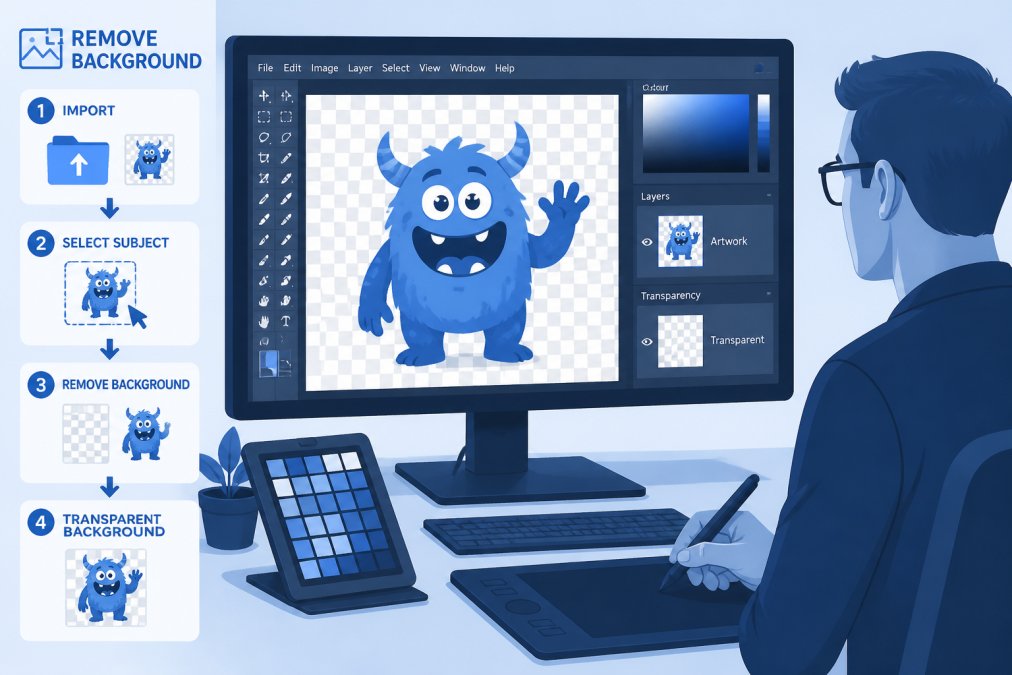
In Photoshop, use the Magic Wand, Quick Selection, or Refine Edge tools to select the background. Once selected, delete it and ensure your layer has an alpha channel (transparency support). Export as PNG to preserve the transparent background. For complex backgrounds, the Select and Mask workspace provides more precise control.
Handling Transparency, Fine Details, and Hairlines
Transparency in DTF artwork requires careful management because semi-transparent pixels and hairline elements can disappear entirely during the print process if not prepared correctly. Hairlines (lines thinner than 1 point) often disappear or become inconsistent. Increase minimum line weight to at least 1.5 points to ensure visibility.
Fine details require particular attention. Small text below 8 points becomes illegible on transfers. Intricate patterns with gaps smaller than 2mm may not print clearly. Stick to fully transparent or fully opaque wherever possible, as semi-transparent areas may receive partial white underbase, creating unpredictable colour shifts.
Colour Management and ICC Profile Implementation
ICC profiles are standardised colour definitions that ensure consistent colour reproduction across different devices, printers, and display systems. Without ICC profile management, colours displayed on your RGB monitor won't match what a CMYK DTF printer outputs.
Most DTF providers specify which ICC profile you should use for your artwork. Download the correct profile for your specific printer model and install it in your operating system's colour management settings. In Photoshop, apply the ICC profile through Edit > Assign Profile or Edit > Convert to Profile.
Colour accuracy depends on your monitor calibration, the ICC profile you're using, and the DTF printer's colour management settings. A poorly calibrated monitor is the most common culprit for colour mismatches.
DTF Artwork Checklist: Pre-Submission Quality Control
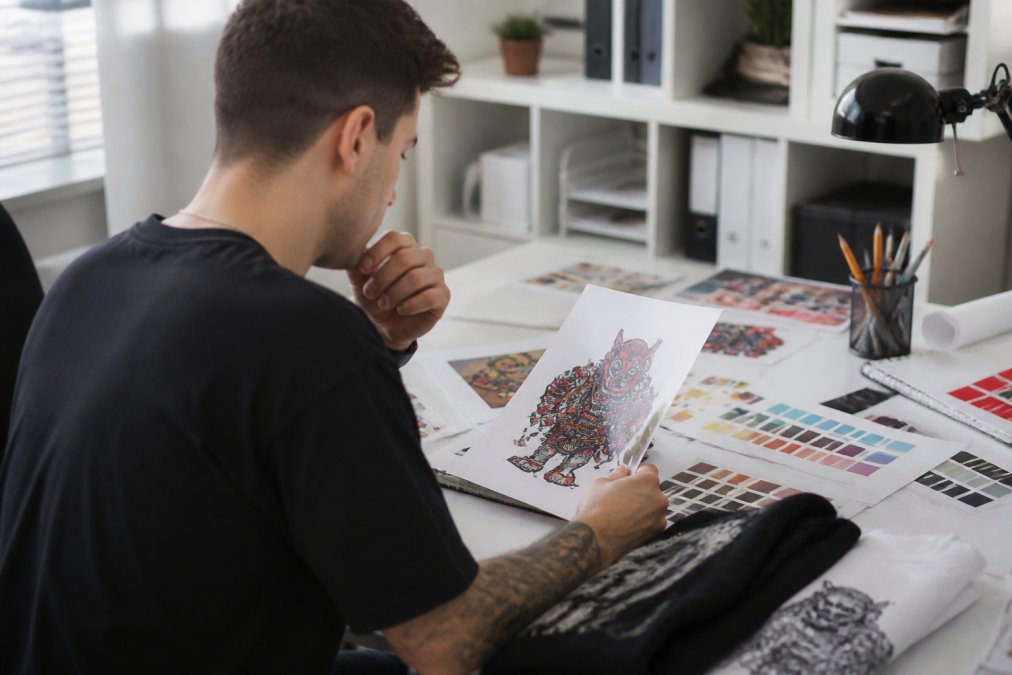
Before uploading your artwork to any DTF provider, work through this checklist systematically. Each item represents a common failure point that can result in poor-quality transfers or production delays.
Resolution and File Size:
- Artwork is 300 DPI minimum at final print size
- File dimensions match your intended garment print area
- File size is reasonable (under 50MB for most gang sheets)
Colour and Transparency:
- Artwork is in RGB colour mode, not CMYK
- Transparent areas are fully transparent (no grey halos or semi-transparent pixels)
- ICC profile has been applied or embedded
- Colours appear accurate on a calibrated monitor
File Format and Compatibility:
- File is PNG, TIFF, PDF, or AI (vector source)
- Filename uses standard characters (no special symbols or spaces)
- File has been saved and is not corrupted
Design Elements:
- Hairlines and fine details are minimum 1.5 points thick
- Text is minimum 8 points for readability
- All fonts are either embedded or converted to outlines (for vector files)
- No transparent gradients or opacity effects below 100%
Gang Sheet Specific:
- All designs are aligned to the grid correctly
- Spacing between designs meets minimum requirements (typically 1cm)
- Each design is the correct size for its intended garment
- Design placement avoids seams and problematic garment areas
Final Verification:
- You've zoomed to 100% and inspected fine details
- You've tested colours on a calibrated monitor or requested a test print
- You've confirmed the file opens correctly on a different computer
- You've created a backup copy of the original file
Working through this checklist takes 10-15 minutes but prevents the majority of quality issues that result in reprints or customer dissatisfaction.
Scaling, Sizing, and Artboard Setup for DTF Gang Sheets
Gang sheets combine multiple designs onto a single transfer sheet, maximising efficiency and reducing costs. Proper sizing and positioning ensure all designs print correctly and align precisely on the garment during application.
Your artboard dimensions depend on your DTF printer's maximum transfer sheet size. Most DTF providers work with A4 (210 × 297mm) or A3 (297 × 420mm) sheets. Each design requires specific spacing to prevent ink bleed between adjacent artworks. Minimum spacing is typically 10-15mm between design edges.
A design that's 1000 pixels wide at 300 DPI equals approximately 84mm. If you need that design to print at 150mm, you must increase the file dimensions to 1800 pixels (maintaining 300 DPI). Design at the final size whenever possible.
When creating gang sheets in Photoshop or Illustrator, set up your artboard at the exact transfer sheet dimensions (210 × 297mm for A4). Place guides at 10mm intervals to help position designs with consistent spacing. Maintain consistent file naming conventions and label each design layer clearly.
Preparing artwork for DTF requires attention to technical specifications that differ from other printing methods, but the payoff is exceptional transfer quality and durability. Every decision you make, from resolution and colour mode to transparency handling and ICC profile implementation, directly impacts the final result on the garment.
The checklist approach transforms artwork preparation from a vague process into a systematic workflow. By addressing resolution, colour, transparency, and file format before submission, you eliminate the most common quality issues. BB5wholesale's gang sheet builder and 24/7 customer support team can answer specific questions about your artwork, but this guide gives you the foundation to prepare professional-quality files independently.
Start with proper specifications, maintain consistency across all design elements, and verify everything before uploading. These habits ensure your custom apparel transfers look professional and perform durably through repeated washing and wearing. Quality artwork preparation is the difference between transfers that fade and crack after a few washes and those that maintain vibrant colours and crisp detail for years.
Ready to upload your gang sheet? Learn more about DTF printing best practices from industry standards before you submit, and reach out to the BB5wholesale support team if you have questions about your specific artwork requirements.
Frequently Asked Questions
What is the recommended DPI for DTF artwork?
DTF artwork should be prepared at 300 DPI (dots per inch) for optimal print quality. This resolution ensures sharp edges, vibrant colours, and prevents pixelation when your design is transferred onto garments. Lower DPI settings may result in blurry or low-quality prints, particularly for fine details and text. Always confirm your specific requirements with your DTF provider, as some may have slightly different standards.
What file format is best for DTF printing?
PNG and PDF are the best file formats for DTF printing. PNG preserves transparency and background removal, making it ideal for designs with transparent areas. PDF maintains design integrity and is excellent for complex artwork with multiple layers. Adobe Illustrator (AI) files are also acceptable if your provider supports them. Always export files in CMYK colour mode to ensure accurate colour reproduction on garments.
Do I need to mirror my artwork for DTF transfers?
No, you do not need to mirror your artwork for DTF transfers. Unlike screen printing or traditional heat transfers, DTF printing applies designs in the correct orientation directly onto the transfer film. Your design will print exactly as you create it. However, always verify this with your DTF provider, as some processes may have specific requirements. BB5wholesale's gang sheet builder handles orientation automatically for your convenience.
How do I handle transparency in DTF files?
Save your design in PNG format to preserve transparency. Use your design software to remove or make the background transparent, ensuring clean edges around your artwork. DTF printing supports transparent areas, allowing the garment colour to show through. When exporting, confirm that transparency is maintained and not flattened to a white background. This is especially important for designs with irregular shapes or when you want the garment colour to be part of the final design.
What should I include in my DTF artwork checklist before submission?
Your DTF artwork checklist should verify: 300 DPI resolution, correct file format (PNG or PDF), CMYK colour mode, transparency properly handled, no hairlines thinner than 0.5pt, solid edges without pixelation, ICC profile embedded, and correct sizing for your intended garment. Check for any design elements that may not print clearly, ensure colours are vibrant and accurate, and confirm that all text is properly outlined or rasterized. Review the complete specifications with your DTF provider before uploading your gang sheet.
Why does my DTF print look pixelated?
Pixelation typically occurs when artwork is prepared at insufficient resolution (below 300 DPI), when raster images are scaled too large, or when files are exported at incorrect settings. Ensure your original artwork is created at 300 DPI or higher, avoid enlarging low-resolution images, and use vector graphics where possible for sharp edges. If using raster images, maintain the original size or scale down rather than up. Confirm your colour settings and ICC profile are correct, as these can also affect print clarity.
Do I need a white ink layer for DTF printing?
Yes, DTF printing typically requires a white underbase layer, particularly when printing on dark garments. The white ink creates opacity and ensures your design colours appear vibrant and true-to-colour on darker fabrics. For light-coloured garments, white ink may still be applied but is less critical. Some designs benefit from selective white layering to enhance specific elements. Your DTF provider can advise on white ink requirements based on your garment colour and design specifications.
How do I prepare my artwork for DTF using Adobe Photoshop or Illustrator?
In Adobe Photoshop, create your artwork at 300 DPI in CMYK colour mode, remove the background to create transparency, and export as PNG. In Adobe Illustrator, ensure all text is outlined and artwork is rasterized at 300 DPI if needed, set the colour mode to CMYK, and export as PDF or PNG with transparency preserved. Both programmes allow you to embed ICC profiles for accurate colour management. Save multiple versions to preserve your original work, and always test export settings before submitting your final gang sheet.
This article was written using GrandRanker