


Prevent DTF Transfers from Peeling: A Step-by-Step Guide

Table of Contents
- Why DTF Transfers Peel: Common Causes
- Best Heat Press Settings for DTF Success
- Fabric Preparation and Pre-Press Steps
- Troubleshooting DTF Adhesion Issues by Fabric Type
- DTF Transfer Washing Instructions for Durability
- Post-Press Curing and Storage Best Practices
- Equipment Calibration and Maintenance
- Conclusion
Last Updated: August 15, 2026
Why DTF Transfers Peel: Common Causes
DTF transfer peeling occurs when adhesion between the transfer film and fabric substrate fails. The most common cause is inadequate heat, pressure, or dwell time for the specific fabric type. Different materials, cotton, polyester, and blends, require distinct settings to achieve proper polymerisation of the adhesive powder.
Moisture is another silent killer. Fabric that hasn't been properly dried before pressing traps steam under the transfer, creating a barrier between the adhesive and substrate. High humidity in your workspace during application can compromise adhesion without you realising it's happening.
Incorrect peel technique also plays a significant role. Peeling too quickly or at the wrong temperature can tear the carrier sheet away before the adhesive has fully cured, leaving partial transfer behind on the fabric. Finally, low-quality transfers or transfers stored improperly lose adhesive potency over time.
Best Heat Press Settings for DTF Success
Getting your heat press dialled in correctly is non-negotiable for preventing DTF transfers from peeling. The three variables you control are temperature, pressure, and dwell time, and all three must work together.
Temperature, Pressure and Dwell Time
Temperature settings for DTF transfers typically range between 150°C and 180°C, depending on the fabric type and transfer specification. Most DTF suppliers recommend 160°C as a starting point for cotton and cotton-blend garments. Polyester fabrics often require 170°C to 180°C for optimal adhesion.
Pressure is measured in PSI (pounds per square inch). Standard DTF application requires between 3 and 4 PSI of consistent, even pressure across the entire platen. Insufficient pressure below 3 PSI leaves gaps preventing full contact and adhesion. Excessive pressure above 5 PSI can crush the adhesive powder and distort fine details.
Dwell time typically ranges from 10 to 15 seconds for standard DTF transfers on cotton. This timeframe allows the adhesive powder to melt and bond with the fabric fibres. Too short, under 8 seconds, and the adhesive doesn't fully cure. Too long, over 20 seconds, risks scorching delicate fabrics.
The relationship between these three variables is critical. A slightly lower temperature can work if you extend dwell time. Higher pressure compensates for marginal temperature settings. Start with your transfer supplier's recommended baseline and adjust incrementally.
Use an infrared thermometer to verify your heat press platen temperature. Many heat presses display inaccurate readings. A 10°C variance between the display and actual platen temperature is common, which is enough to cause adhesion failure.
Hot Peel vs. Cold Peel Technique
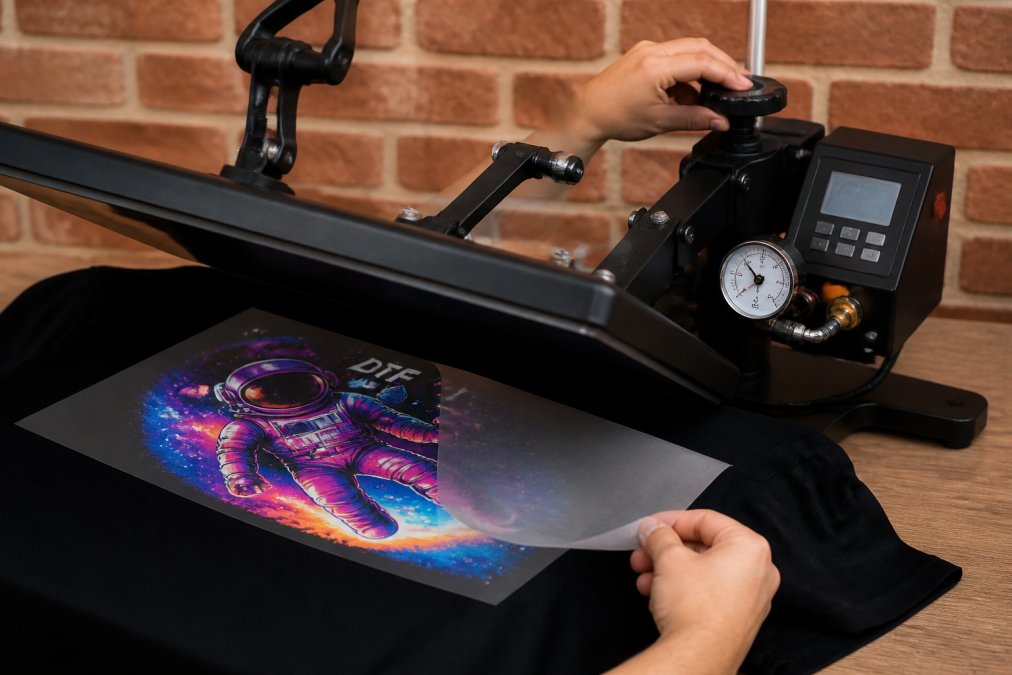
The moment you lift the transfer off the fabric determines whether adhesion succeeds or fails. DTF transfers use two peel methods, and choosing the right one for your specific transfer is essential.
Hot peel means removing the carrier sheet while the transfer is still warm, typically within 3 to 5 seconds of the heat press opening. The adhesive is still slightly tacky, allowing the carrier to separate cleanly without pulling the design away from the fabric. Hot peel is faster and works well for most standard DTF transfers on cotton and blends.
Cold peel requires cooling the transfer completely, usually 33 seconds to 2 minutes, before removing the carrier sheet. As the transfer cools, the adhesive sets fully, creating a stronger bond. Cold peel produces more durable results, particularly on polyester and synthetic fabrics. The trade-off is production time.
Your transfer supplier specifies which method to use. Some transfers are engineered for hot peel; attempting cold peel on these will cause the carrier to tear prematurely. Conversely, cold-peel transfers peeled while still warm won't have set enough, and the carrier will pull the design partially away from the fabric.
Peel the carrier sheet back at a 45-degree angle, not straight up. A vertical pull creates more stress on the transfer-fabric bond. A 45-degree angle distributes force more evenly and reduces the risk of lifting.
Fabric Preparation and Pre-Press Steps
What happens before the transfer touches the heat press determines half of your success. Most peeling issues start with inadequate fabric preparation.
Cotton and cotton-blend garments must be completely dry before pressing. Any residual moisture creates a barrier between the transfer adhesive and the fabric fibres. Lay garments flat in a warm, dry environment for at least 30 minutes before pressing. In high-humidity conditions, extend this to 1 hour.
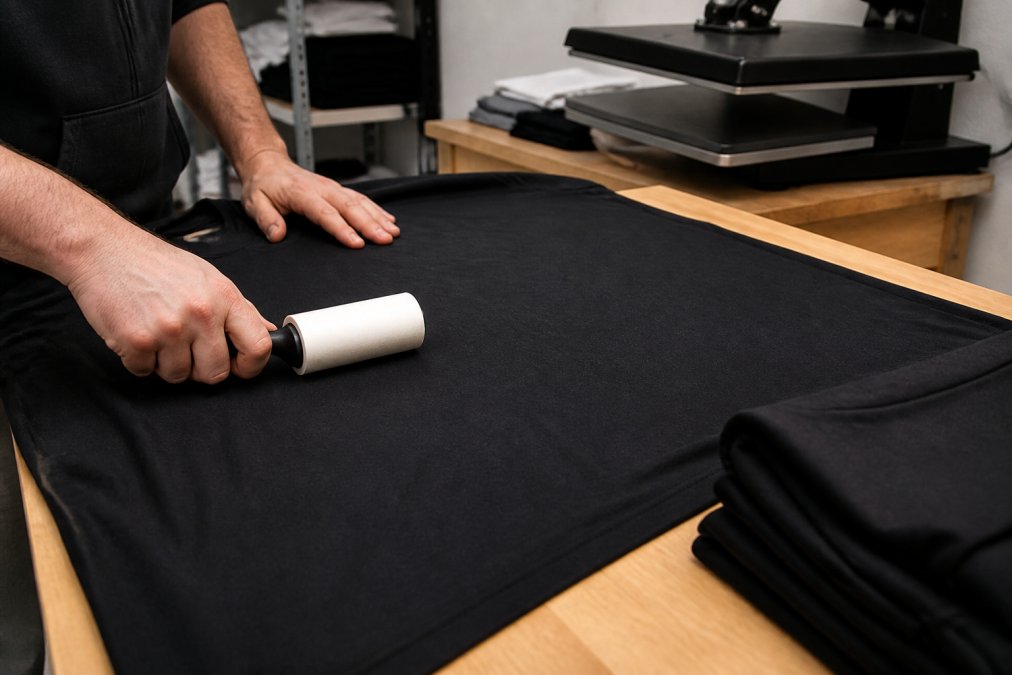
Inspect the fabric surface for lint, dust, or debris. These particles prevent full contact between the transfer and the substrate. Use a lint roller or soft brush to clean the area where the transfer will be applied. Pay particular attention to textured fabrics like fleece or French terry.
Pre-pressing the garment, running the heat press over the fabric for 3 to 5 seconds before applying the transfer, removes final traces of moisture and evens out wrinkles that would prevent the transfer from sitting flat on the platen. Uneven contact is a leading cause of partial adhesion and subsequent peeling.
For delicate or specialty fabrics (silk, linen, nylon), consider using a silicone or Teflon sheet between the platen and the transfer. This distributes heat more evenly and prevents the platen from directly scorching the fabric.
Troubleshooting DTF Adhesion Issues by Fabric Type
Not all fabrics behave the same under heat and pressure. Understanding how different materials respond helps you diagnose and fix peeling problems.
Cotton and Cotton Blends
Cotton is the most forgiving substrate for DTF transfers. If transfers peel on cotton, the most likely cause is insufficient dwell time or pressure. Start by increasing dwell time by 2 seconds. If peeling persists, check your pressure setting with a pressure gauge. Aim for 3.5 PSI on cotton as a baseline.
If the transfer lifts cleanly but adhesive powder remains on the fabric, the adhesive didn't fully melt. Increase temperature by 5°C and test again. Cotton typically tolerates temperatures up to 180°C without damage.
Cotton blends with polyester behave slightly differently than 100% cotton. Most poly-cotton blends perform best at 165°C to 170°C with 3.5 to 4 PSI pressure.
Polyester and Synthetic Fabrics
Polyester is trickier than cotton. It doesn't absorb moisture, but it's more sensitive to heat damage. Excessive temperature causes the fibres to melt or glaze, preventing the adhesive from gripping properly.
For polyester, start at 170°C rather than 160°C. Polyester fibres require more heat to create the surface conditions needed for adhesion. Don't exceed 180°C without testing first.
Dwell time on polyester should extend to 12 to 15 seconds. Pressure settings remain at 3 to 4 PSI, but ensure it's consistent across the entire platen. If transfers peel on polyester, use cold peel technique rather than hot peel. Allow at least 60 seconds of cooling before peeling.
Nylon and other technical synthetics require 175°C to 185°C and longer dwell times of 15 to 20 seconds. Test on scrap fabric first, as these materials can scorch easily.
Delicate and Specialty Fabrics
Silk, linen, and delicate knits are temperature-sensitive and can scorch or shrink if exposed to excessive heat.
For silk, reduce temperature to 150°C and extend dwell time to 15 to 20 seconds. Use a silicone or Teflon sheet to distribute heat evenly. Linen requires thorough pre-drying and extra cooling time before peeling. Temperature of 160°C with 15-second dwell time works for most linen.
Delicate knits need lower pressure to avoid distortion. Reduce pressure to 2.5 to 3 PSI and increase dwell time to compensate.
DTF Transfer Washing Instructions for Durability
How a garment is washed after transfer application directly impacts how long the design stays bonded to the fabric.
Customers should wait at least 24 hours before washing a newly transferred garment. This allows the adhesive to fully cure and harden. When washing, use cold water and turn the garment inside out. Hot water softens the adhesive bond, particularly on polyester. Inside-out washing protects the transfer from direct friction with other garments.
Use a gentle detergent without bleach or fabric softener. Fabric softener coats fibres and reduces adhesion. Bleach can break down both the transfer film and the adhesive. Air dry whenever possible; high heat from a tumble dryer weakens the bond over time.
For garments that receive frequent washing, recommend customers avoid the dryer entirely. Line drying or flat drying preserves the transfer's longevity. Include care instructions with orders, as many peeling complaints come from customers washing transfers incorrectly.
Post-Press Curing and Storage Best Practices
The first 24 to 48 hours after application are critical for adhesive hardening. Allow the transfer to cool completely at room temperature. Don't expose it to air conditioning immediately; rapid cooling can create stress on the adhesive bond. Let it sit for at least 30 minutes before handling or packing.
Store finished garments in a cool, dry place away from direct sunlight. Heat and UV light degrade both the transfer film and the adhesive over time.
For transfers awaiting application, store uncut gang sheets flat and dry at room temperature. Avoid stacking heavy items on top, as pressure and heat can cause the adhesive powder to activate prematurely. Store away from heat sources and direct sunlight.
Maintain storage at 40% to 60% relative humidity. Very dry conditions can cause the carrier sheet to become brittle. Very humid conditions can activate the adhesive prematurely. Use a dehumidifier or humidifier if your workspace is particularly humid or dry.
Equipment Calibration and Maintenance
Your heat press is only as reliable as its calibration. Many peeling problems stem from equipment drift rather than technique failure.
Check platen temperature weekly using an infrared thermometer. Place the thermometer on the platen surface, close the press for 30 seconds, then read the temperature. A variance of more than 5°C from your heat press display indicates calibration drift. Most heat presses allow temperature adjustment via a control panel or internal calibration screw.
Pressure calibration is equally important. Use a pressure gauge to measure actual PSI at the platen. Repeat at three different platen locations to check for uneven pressure. Variance of more than 0.5 PSI across the platen indicates mechanical wear requiring professional servicing.
Inspect the platen surface monthly for pits, scratches, or uneven wear. A damaged platen should be resurfaced or replaced. Clean the platen after every 50 to 100 transfers with a soft cloth and mild cleaner.
Check heating element connections quarterly. Loose wiring can cause temperature fluctuations. Keep maintenance records to reveal patterns over time.
BB5wholesale's 24/7 support team can guide you through calibration procedures if you're unsure. Many peeling issues can be resolved by verifying your equipment settings before adjusting your technique.
Conclusion
Preventing DTF transfers from peeling requires attention to three interconnected areas: your heat press settings, fabric preparation, and post-application care. Temperature, pressure, and dwell time must align with your specific fabric type. Pre-drying fabric and using the correct peel technique makes the difference between transfers that last and designs that fail after a few washes.
DTF transfer failures cost time and money. If you're experiencing consistent peeling despite following these steps, your transfers themselves may be the limiting factor. BB5wholesale provides high-quality DTF transfers engineered for durability, backed by 24/7 customer support to help you troubleshoot application issues. Our gang sheet builder simplifies production, and fast door-to-door delivery means you get quality transfers when you need them. Upload your gang sheet to BB5wholesale and get started with transfers designed to stay bonded through repeated washing and wearing.
Frequently Asked Questions
Do you peel DTF transfers hot or cold?
The correct peel method depends on your transfer and fabric type. Most DTF transfers require a hot peel immediately after pressing, while the adhesive is still thermoplastic and flexible. Peeling while hot prevents cracking and ensures clean separation from the carrier sheet. However, some specialty transfers benefit from a cold peel after 10-15 seconds of cooling. Check your transfer manufacturer's guidance, and test both methods on scrap fabric to determine which yields the best adhesion for your specific setup.
What is the correct heat press temperature for DTF transfers?
Most DTF transfers require 160-180°C for 10-15 seconds, though exact settings vary by transfer type and fabric. Always verify the manufacturer's recommended temperature on your transfer packaging. Use an infrared thermometer to confirm your platen reaches the target temperature, as many heat presses display inaccurate readings. Lower temperatures may result in poor adhesion and peeling; higher temperatures risk scorching fabric or damaging the transfer film. Start at the manufacturer's minimum setting and increase gradually if transfers lift after washing.
How do I fix DTF peeling after washing?
Once peeling has occurred, the transfer cannot be fully restored, but you can prevent future failures. Wash garments inside-out in cold water below 40°C using a gentle cycle and mild detergent. Avoid bleach, fabric softener, and tumble drying, which accelerate peeling. For new transfers, ensure your heat press reaches the correct temperature, apply adequate pressure (typically 3-4 bar), and maintain dwell time for full curing. If peeling persists, test your equipment with an infrared thermometer to verify platen heat distribution and check that fabric sizing agents haven't interfered with adhesion.
How can I tell if my DTF transfer is cured correctly?
A properly cured DTF transfer should feel firmly bonded to the fabric with no give when you gently pull the edge. After pressing, allow the transfer to cool for 1-2 minutes before the peel test. The adhesive powder should have fully polymerised, creating a permanent thermoplastic bond. You can perform a wash durability test: wash the garment 3-5 times in cold water and inspect for lifting, cracking, or flaking. If the transfer remains intact after multiple washes, curing was successful. If adhesion fails early, your temperature, pressure, or dwell time likely needs adjustment.
This article was written using GrandRanker