


5 Ways to Brand Glass Bottles with UV DTF

Table of Contents
- What Is UV DTF Printing and Why It Works on Glass
- 1. Full-Wrap Bottle Branding with UV DTF
- 2. Minimalist Logo Decals for Retail-Ready Glassware
- 3. UV DTF Application Tips for Beginners: Tools and Step-by-Step Process
- 4. Best Practices for UV DTF on Glass: Surface Preparation and Curing
- 5. Durability and Dishwasher Safety: Long-Term Care for Branded Glass Bottles
- Alternatives to UV DTF for Promotional Merchandise
- Conclusion
- Frequently Asked Questions
Last Updated: September 15, 2026
What Is UV DTF Printing and Why It Works on Glass
UV DTF printing is a digital decoration method that cures UV-sensitive ink onto a transfer film, which is then bonded to a hard surface with a pressure-sensitive adhesive layer. It works on glass because the cured ink sits on the surface rather than soaking in, giving a raised 3D texture that survives handling and washing. This guide from BB5wholesale covers five practical ways to brand glass bottles with UV DTF, from full-wrap labels to minimalist logo decals.
Glass is a non-porous surface, which is exactly why UV DTF suits it. Traditional screen printing on glass needs high-temperature curing, and vinyl decals need a separate lamination step. UV DTF skips both. The printed transfer is weeding-free, so a custom run of 20 bottles takes the same setup time as a run of 200.
The five approaches below cover the full range from hobbyist to commercial-grade production. Each one has a different cost, skill requirement and finish quality, so the right choice depends on what you are branding and how many you need.
1. Full-Wrap Bottle Branding with UV DTF
Full-wrap branding covers the entire circumference of the bottle with a single continuous design. It is the most visually striking option and the one most often requested for premium spirits, cold brew and gift sets. The main challenge is design alignment: a flat transfer film must curve around a cylindrical surface without wrinkling or misaligning the seam.
Design Alignment for Curved Surfaces
The trick is to break the wrap into a central panel and two side panels before printing. Print the design so the seam lands on the back of the bottle, not the front, and add a small overlap allowance so the two edges meet cleanly. For tapered bottles, taper the artwork by the same angle as the bottle wall, otherwise the top of the transfer will buckle.
Advanced full-wrap work often uses a two-stage application: apply the main body first, then add a smaller cap-band or neck decal as a separate transfer. This keeps surface tension even and reduces the chance of trapped air. For high-volume runs, the UV DTF gang sheet builder from BB5wholesale lets you arrange multiple wrap designs on one sheet, which cuts material waste and keeps per-unit costs predictable.
2. Minimalist Logo Decals for Retail-Ready Glassware
Minimalist decals are the fastest route to retail-ready glassware. A single-colour logo or a small monogram applied to the shoulder or base of a bottle reads as premium without the cost of a full wrap. Because the transfer is weeding-free, even a fine-line logo with small interior counters prints cleanly at high print resolution.
Three placement rules matter more than the artwork itself:
- Keep the decal at least 15 mm from the base so it clears shelf wear
- Align the logo to the bottle's vertical axis, not the label's, or it will look tilted
- Leave the neck clear if the bottle will be capped or sleeved
For Etsy sellers and small promotional runs, this is usually the best value approach. One gang sheet can hold dozens of small logos, so a mixed batch of 30 bottles with different names or colours costs the same as a single design.
3. UV DTF Application Tips for Beginners: Tools and Step-by-Step Process
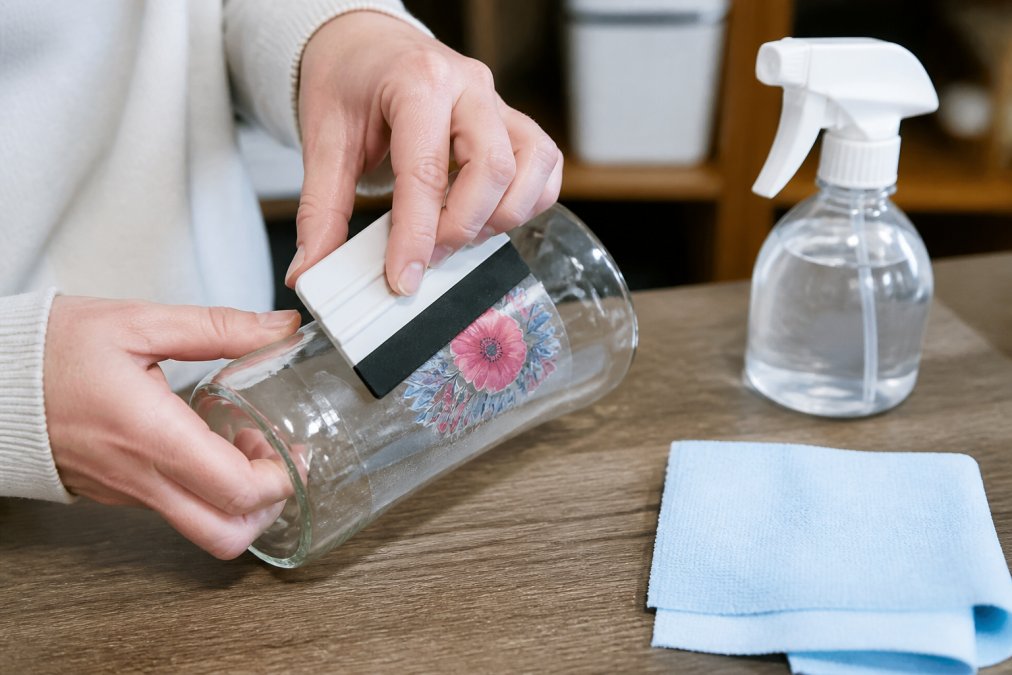
Beginners get the best results by treating application as a controlled, two-stage process: prepare the substrate, then activate the adhesive under even pressure. Rushing either stage is the single most common cause of peeling and bubbles. The steps below are the same ones used for commercial runs, the only difference at scale is that you batch the prep and the squeegee passes rather than doing them bottle by bottle.
What You'll Need
- UV DTF transfer sheet (gang sheet or single design)
- Isopropyl alcohol (typically 70% or higher) and a lint-free cloth
- Squeegee or hard-edged applicator card with a felt edge
- Transfer tape or application film for repositionable placement
- Clean nitrile gloves to avoid fingerprints on the adhesive layer
- A small roller or felt-edged squeegee for edge pressure
- Masking tape for anchoring the transfer before peel
Application Steps
- Clean the glass with isopropyl alcohol and let it dry fully, a minimum of 60 seconds at room temperature, longer in a cold workshop.
- Position the transfer and tape it in place so it cannot shift. Anchor at least two opposite corners.
- Peel the backing and lay the transfer from the centre outward, keeping the film slightly tensioned so it does not fold back on itself.
- Press firmly with the squeegee, working from the middle to the edges in overlapping strokes. Aim for two full passes, one light to seat the film, one firm to activate the adhesive.
- Pay extra attention to the edges and any tight curvature; these are where lifting starts.
- Peel the carrier film slowly at a low angle (under roughly 45 degrees) so the ink stays bonded to the glass rather than lifting with the film.
- Let the adhesive activate for the recommended curing time before handling, washing or packaging.
Troubleshooting Common Application Errors
Most beginner failures fall into four patterns. Diagnosing which one you have is faster than reprinting blindly.
- Edges lifting after peel: usually under-squeegeed edges or a cold substrate. Re-clean, warm the glass slightly with a hairdryer on low, and re-squeegee with a felt edge.
- Bubbles trapped under the design: caused by laying the film from one edge rather than the centre. Lift the nearest corner, re-lay from the centre, and push air out with overlapping strokes.
- Ink separating from the carrier film: the peel angle was too steep or the peel was too fast. Slow down and keep the film close to the surface as you pull.
- Adhesive grabbing dust or fingerprints: the bottle was handled after cleaning, or gloves were not worn. Re-clean and handle only by the base.
Health and Safety Executive guidance on safe use of isopropyl alcohol is worth checking if you are setting up a workshop, since ventilation and storage rules apply to bulk solvent use.
4. Best Practices for UV DTF on Glass: Surface Preparation and Curing
Surface preparation decides whether your branding lasts a week or a year. Glass arrives from suppliers with a release agent and dust film that repel adhesive, so the substrate preparation step is not optional. Wipe with isopropyl alcohol, then handle the bottle only by the base or with gloves.
Curing is the second half of the equation. UV DTF ink is already cured during printing, but the adhesive needs time and pressure to bond. A cold lamination pass with a squeegee or roller improves transfer pressure and pushes out trapped air. Leave the finished bottle for the full curing time before washing or packaging.
5. Durability and Dishwasher Safety: Long-Term Care for Branded Glass Bottles
Dishwasher safety is where most UV DTF branding fails, and the failure is usually avoidable. Domestic dishwashers run hotter and use stronger detergent than hand washing, which softens the adhesive over repeated cycles.
Why Dishwashers Attack UV DTF
Three mechanisms do the damage, and they compound:
A Practical Wash-Test Protocol
Long-Term Care Protocols
Scratch and Water Resistance
Alternatives to UV DTF for Promotional Merchandise
| Method | Best For | Setup Cost | Full-Colour |
|---|---|---|---|
| UV DTF | Small to mid custom runs | Low | Yes |
| Screen printing | Large single-colour runs | High | No |
| Vinyl decals | Simple one-off designs | Low | Limited |
| Ceramic printing | Long-life premium bottles | Very high | Yes |
Conclusion
Frequently Asked Questions
How do you ensure UV DTF stickers adhere properly to glass?
Clean the glass surface with isopropyl alcohol to remove oils and dust. Apply the transfer film with firm, even pressure using a squeegee, working from the centre outward to push out air bubbles. Wait at least 24 hours before washing. The adhesive layer on UV DTF transfers activates with pressure, so take your time. For best results, use a UV DTF gang sheet from a trusted supplier like BB5wholesale, which offers consistent adhesive quality.
Is UV DTF printing durable on glass drinkware, and can it go in the dishwasher?
UV DTF prints on glass are scratch-resistant and waterproof when applied correctly. For dishwasher safety, place items on the top rack and use a mild cycle. Avoid abrasive detergents and high heat, which can weaken the adhesive over time. Hand washing will maximise longevity. Following best practices for UV DTF on glass, including proper curing and a 24-hour wait before first wash, helps the design last for months.
What is the difference between standard DTF and UV DTF for glass?
Standard DTF transfers are designed for fabrics and require heat pressing to bond. UV DTF transfers use a UV-curable ink and adhesive layer that bond to hard, non-porous surfaces like glass, metal, and plastic at room temperature. UV DTF is weeding-free and needs only pressure to apply. It also provides a raised 3D texture and better scratch resistance, making it ideal for branding glass bottles and tumblers.
Can UV DTF transfers be used on curved glass surfaces?
Yes, UV DTF transfers conform to curved surfaces when applied with care. For full-wrap bottles, cut the transfer film into smaller sections or use a design that follows the curve. Apply pressure gradually with a squeegee, starting from the centre and working outward. For complex curves, gentle heat from a hairdryer can make the film more flexible. This technique works well for custom runs on rounded bottles.