


DTF Transfers Peeling After Wash: Causes & Fixes

Table of Contents
- Why DTF Transfers Peel After Washing
- Under-Curing and Incomplete Polymerisation
- Correct Heat Press Temperature for DTF Application
- How to Prevent DTF Cracking During the Curing Process
- Pressure, Dwell Time, and Fabric Preparation
- DTF Wash Test Instructions and Best Practices
- Choosing High-Quality DTF Film and Adhesive Powder
- Conclusion
- Frequently Asked Questions
Last Updated: September 1, 2026
Why DTF Transfers Peel After Washing
DTF transfers peeling after wash is one of the most frustrating issues custom apparel creators face. You've invested time designing, printed the transfers, applied them perfectly to garments, and then after a few washes, the edges start lifting or the entire design flakes away. The problem isn't random, it's almost always traceable to one of a handful of specific causes during production or application.
Understanding what causes DTF transfers to peel is the first step toward preventing it. The durability of a direct-to-film transfer depends on multiple interconnected factors: how thoroughly the adhesive powder cures, the temperature and pressure applied during heat pressing, the condition of the fabric itself, and how the finished garment is washed. Miss any one of these, and you'll see peeling within the first few washes.
At BB5wholesale, we've analysed thousands of orders from custom apparel businesses and print shops, and the patterns are consistent. The transfers that hold up through repeated washing share three characteristics: complete polymerisation of the adhesive layer, correct heat press application, and proper post-cure handling before the first wash. This guide walks you through each of these factors and shows you exactly how to diagnose and fix peeling issues.
Under-Curing and Incomplete Polymerisation
The most common reason DTF transfers peel is under-curing of the adhesive powder. When the adhesive doesn't fully cure, the bonding between the transfer film and the fabric remains incomplete. The ink and powder sit on the surface rather than forming a permanent chemical bond.
Polymerisation is the process where the adhesive powder transforms from loose particles into a solid, cross-linked polymer layer. This doesn't happen at room temperature, it requires sustained heat. Many creators assume that a quick pass through a heat press is enough, but incomplete curing leaves the transfer vulnerable. The first wash, or even just wearing the garment, creates enough stress to separate the layers.
The fix is straightforward: ensure your curing process delivers consistent, adequate heat for the full recommended duration. If you're using a standard heat press, this typically means 15-20 seconds at the correct temperature (covered in the next section). Some high-volume operations use dedicated curing ovens, which provide more even heat distribution and are worth the investment if you're processing dozens of transfers daily.
A practical diagnostic: if peeling starts at the edges and works inward, under-curing is the likely culprit. The edges cool faster than the centre, so they're the first to fail if the adhesive hasn't fully polymerised.
Correct Heat Press Temperature for DTF Application
Heat press temperature is non-negotiable for DTF transfer durability. Too low, and the adhesive won't cure completely. Too high, and you risk damaging the fabric or the ink itself, causing cracking or colour degradation.
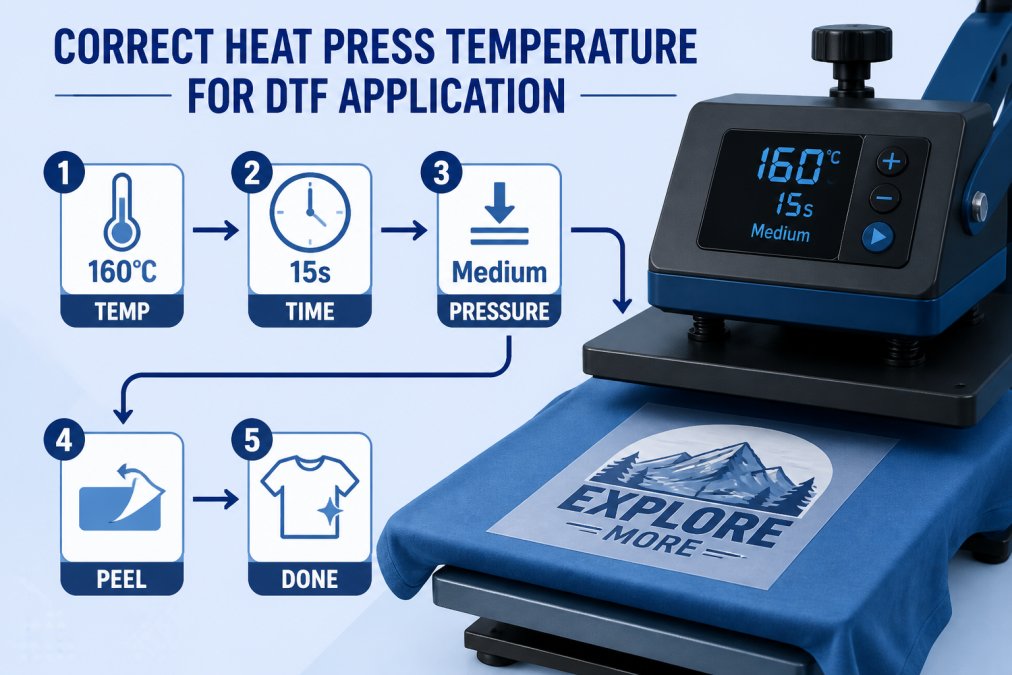
The standard range for most DTF transfers is 160-180°C, but this varies depending on the fabric type and the specific adhesive powder formulation (peer-reviewed research). Cotton and cotton-blend garments typically press best at 170°C, whilst synthetic fabrics like polyester may require slightly lower temperatures (160-165°C) to avoid damage (peer-reviewed research). Always check the technical specifications provided with your DTF film and adhesive, different suppliers may have slightly different requirements.
Temperature consistency matters as much as the absolute number. A heat press that reads 170°C but actually fluctuates between 165-175°C will produce inconsistent results. Cheaper heat presses often have poor temperature stability, which is one reason why upgrading equipment pays dividends for high-volume producers. If you're using an older press, consider having it professionally calibrated, or invest in a digital thermometer to verify actual plate temperature.
Dwell time, the duration the garment stays under pressure at temperature, works hand-in-hand with temperature. At 170°C, 15-20 seconds is standard for most transfers (peer-reviewed research). At lower temperatures, you may need 20-25 seconds. At higher temperatures, you can reduce dwell time slightly, but don't be tempted to rush. The adhesive needs time to flow and bond with the fabric fibres.
How to Prevent DTF Cracking During the Curing Process
Cracking and flaking during or immediately after the curing process is a sign that something in the heat application went wrong. Unlike peeling after washing, which suggests incomplete curing, immediate cracking usually points to excessive heat or uneven pressure.
DTF transfers are sensitive to rapid cooling. When you remove a transfer from the heat press, the adhesive is still partially molten. If it cools too quickly, especially if one area cools faster than another, the stress creates cracks. This is why many professional operations use a cooling press: a second press set to a lower temperature (around 60-80°C) that the transfer passes through immediately after the main cure. This allows the adhesive to cool gradually and evenly.
If you don't have access to a cooling press, let transfers cool naturally on a flat surface for at least 2-3 minutes before handling. Don't stack them or fold them whilst they're still warm. The pressure from stacking can cause uneven cooling and micro-fractures in the adhesive layer.
Uneven pressure during pressing is another common cause of cracking. If your heat press has worn platens or isn't level, some areas of the transfer will receive more pressure than others. High-pressure areas heat faster and can cure too quickly, whilst low-pressure areas may under-cure. Check your heat press platens regularly for wear, and ensure the press is sitting on a level surface.
A practical approach: press a test transfer, allow it to cool completely, then perform a manual stress test. Gently flex the garment in all directions. If you see white stress lines appearing in the transfer, the adhesive is too brittle, likely from excessive heat. If the transfer flexes without cracking but peels during washing, the cure wasn't complete.
Pressure, Dwell Time, and Fabric Preparation
Pressure during heat pressing determines how thoroughly the transfer bonds to the fabric. Too little pressure, and the film doesn't make full contact with the garment fibres. Too much pressure can distort the image or damage delicate fabrics.
The standard pressure for DTF transfers is typically 3-4 bar (or 45-60 PSI), though this varies by equipment and fabric type. Heavier fabrics like canvas or denim can handle higher pressure, whilst delicate synthetics need lower pressure. Check your heat press manual for the recommended range, and calibrate it regularly, pressure gauges can drift over time.
Dwell time works in combination with pressure. Adequate pressure with insufficient dwell time leaves the transfer partially bonded. The combination of the two is what creates a durable application. A common mistake is assuming that higher pressure can compensate for shorter dwell time. It can't. Both must be adequate.
Fabric preparation before pressing is often overlooked but critical. Moisture in the fabric interferes with adhesive bonding. If fabric has been stored in a humid environment or has absorbed moisture from the air, pre-press it at 60-70°C for 5-10 seconds to drive off surface moisture. This is especially important for cotton and cotton blends, which absorb moisture readily.
Some fabrics, particularly synthetics, have a smooth finish that resists adhesion. Pre-pressing the garment area where the transfer will go slightly activates the fabric surface and improves bonding. This doesn't need to be aggressive, just a gentle heat pass to open the weave slightly.
DTF Wash Test Instructions and Best Practices
Before shipping finished garments to customers, run a wash durability test. This isn't optional for custom apparel businesses, it's your quality assurance checkpoint. A proper wash test catches problems before they reach customers and damage your reputation.
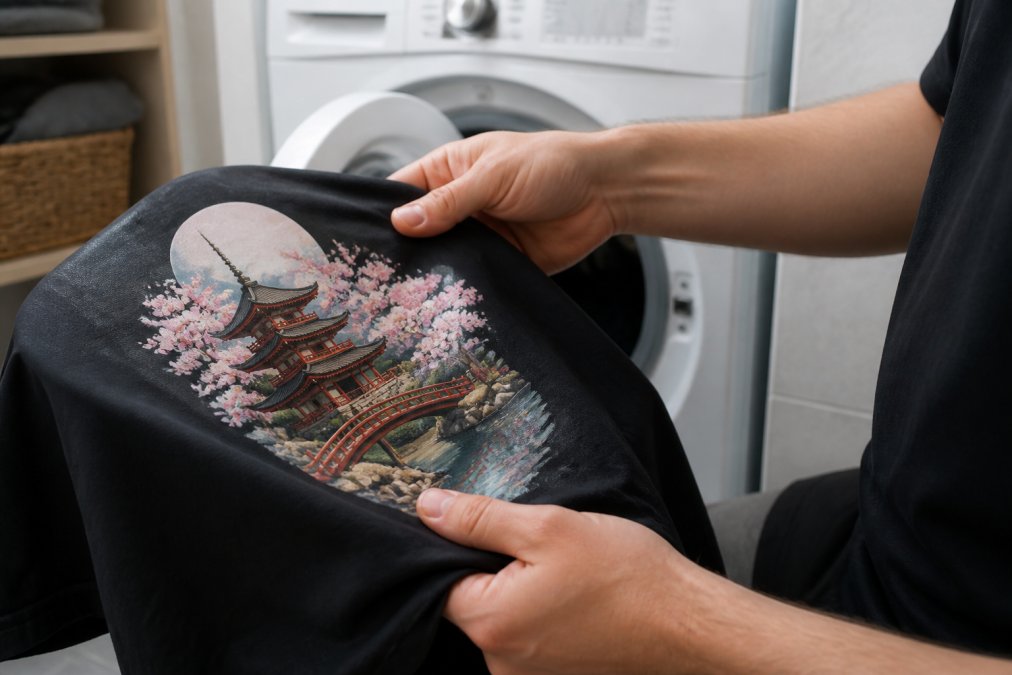
Here's a practical wash test protocol:
-
Prepare test samples. Press 2-3 identical test transfers on the same fabric you'll be using for production. Treat them exactly as you would a customer order, same temperature, pressure, and dwell time.
-
Allow full cure. Let the samples cool and sit for at least 24 hours before washing. The adhesive continues to harden during this time, and testing too early will give false results.
-
Wash at temperature. Use warm water (40-50°C) and a standard detergent. Avoid bleach or optical brighteners, which can degrade the ink. Wash inside-out to minimise abrasion on the transfer surface.
-
Inspect after wash. Look for peeling at the edges, cracking, colour fading, or ink bleeding. Any of these indicates a problem with your process.
-
Repeat the test. Wash the samples 3-5 times, inspecting after each cycle. This simulates several months of normal wear.
The goal is to identify problems in your process before they affect customer orders. If transfers fail the wash test, work backwards through your variables: temperature, pressure, dwell time, and fabric preparation. Change one variable at a time and re-test. This methodical approach quickly identifies the culprit.
Many creators skip this step to save time, then spend far more time dealing with customer complaints and refunds. A 10-minute wash test saves hours of troubleshooting later.
Choosing High-Quality DTF Film and Adhesive Powder
The quality of your DTF film and adhesive powder directly affects durability. Cheap film or poorly formulated adhesive will peel no matter how perfectly you apply it. This is one area where investing in premium materials pays immediate dividends.
High-quality DTF film has consistent ink absorption properties and a stable adhesive layer. When you apply heat, the adhesive should melt uniformly and bond evenly with the fabric. Inferior film often has patchy adhesive coverage or inconsistent ink saturation, which creates weak spots that fail first during washing.
Adhesive powder formulation matters enormously. Premium powders are designed to cure completely at standard heat press temperatures and create a flexible bond that moves with the fabric during washing and wearing. Budget adhesives sometimes don't fully polymerise at standard temperatures, requiring higher heat or longer dwell times, which creates other problems like cracking.
At BB5wholesale, we supply DTF transfers that use premium film and adhesive formulations specifically chosen for durability. Our Build Your Gang Sheet service lets you arrange multiple designs on a single sheet, maximising efficiency without compromising quality. Each transfer is produced with consistent heat and pressure, ensuring reliable results across your entire order.
If you're sourcing transfers from multiple suppliers, you'll likely notice variation in how they perform. This isn't random, it's a direct result of material quality and production standards. Stick with suppliers who are transparent about their materials and can provide wash-test data for their transfers.
| Factor | Impact on Peeling | How to Fix |
|---|---|---|
| Adhesive curing | Incomplete cure = peeling after wash | Ensure full dwell time at correct temperature |
| Heat press temperature | Too low = incomplete bond; too high = cracking | Verify temperature with calibrated thermometer; target 160-180°C |
| Pressure and dwell time | Insufficient pressure or dwell = weak bond | Apply 3-4 bar pressure for 15-20 seconds |
| Fabric moisture | Moisture blocks adhesive bonding | Pre-press fabric at 60-70°C for 5-10 seconds |
| Material quality | Poor film or adhesive = inherent weakness | Source from reputable suppliers; run wash tests |
Conclusion
DTF transfers peeling after wash is preventable. The issue isn't inherent to the technology, it's a result of skipping or rushing one of the critical steps in the production or application process. Complete polymerisation, correct heat press settings, proper fabric preparation, and thorough testing are what separate durable transfers from ones that fail.
The investment in getting these details right, better equipment, quality materials, and a disciplined testing protocol, is far smaller than the cost of reprinting failed orders or managing customer complaints. Custom apparel businesses that take durability seriously build customer loyalty and repeat business. Those that cut corners on these fundamentals face constant quality issues and eroding margins.
Ready to eliminate peeling issues? Start by running a proper wash test on your current process. If you identify problems, work through the variables systematically. If you're sourcing transfers, switch to DTF Transfers By Size from BB5wholesale, premium materials and consistent production standards mean your transfers will hold up through repeated washing. Our 24/7 customer support team can walk you through any application questions, and our fast door-to-door delivery means you'll have stock on hand when you need it.
Frequently Asked Questions
How do I stop DTF transfers from peeling after washing?
DTF transfers peel when the adhesive powder hasn't fully cured or bonded to the fabric. Ensure your heat press reaches the correct temperature (typically 160-180°C for 10-15 seconds), apply consistent pressure across the entire transfer, and allow the garment to cool completely before handling. Use a cold peel technique and avoid washing within 24-48 hours of application. Quality matters too: invest in high-grade DTF film and adhesive powder to maximise durability.
What is the correct heat press temperature for DTF transfers?
Most DTF transfers require 160-180°C, though this varies by adhesive powder type and fabric. Check your supplier's specifications before pressing. Maintain consistent dwell time (10-15 seconds) and apply even pressure across the entire design. Under-heating prevents proper polymerisation of the adhesive, causing peeling. Over-heating can damage synthetic fibres and cause cracking. Use a calibrated heat press to verify actual temperature, as many press displays are inaccurate by 5-10°C.
How do I perform a DTF wash test to check durability?
After pressing, wait 24-48 hours before testing. Wash the garment in cold water (maximum 30°C) using a gentle cycle with mild detergent. Avoid bleach and fabric softener, which weaken adhesive bonds. Tumble dry on low heat or air dry. Inspect the edges and corners for peeling or cracking. Repeat 5-10 wash cycles to simulate real-world durability. If peeling occurs within the first 3 washes, your curing temperature, pressure, or fabric preparation needs adjustment.
Why do DTF transfers crack instead of peel?
Cracking usually results from excessive heat, insufficient moisture in the fabric before pressing, or poor-quality transfer film. Pre-press your garment for 3-5 seconds to remove surface moisture and activate sizing agents in the fabric weave. Avoid pressing over seams or thick fabric layers, which create uneven heat distribution. Use transfer film from reputable suppliers; cheap film is more prone to cracking under stress. If cracking persists, lower your heat press temperature by 5-10°C and increase dwell time slightly.
This article was written using GrandRanker