


7 Common Mistakes to Avoid When Applying UV DTF

Table of Contents
- 1. Skipping Surface Preparation and Cleaning
- 2. Using the Wrong Pressure and Squeegee Technique
- 3. Preventing Bubbles in UV DTF: The Application Mistake That Ruins Decals
- 4. Peeling the Transfer Film Too Fast
- 5. Ignoring the Best Surfaces for UV DTF
- 6. UV DTF Application Troubleshooting: Fixing Lifting Edges and Adhesion Issues
- 7. Forgetting Post-Application Curing and Environmental Factors
- Conclusion
- Frequently Asked Questions
Last Updated: September 18, 2026
1. Skipping Surface Preparation and Cleaning
Most failed UV DTF applications fail because of a dirty surface, not bad transfers.
Clean every surface properly before you start:
- Wipe away visible dust with a dry, lint-free cloth
- Clean the full area with isopropyl alcohol
- Let the surface air dry completely
- Handle the item by its edges only
The Isopropyl Alcohol Rule
Isopropyl alcohol removes the invisible layer of oil and grime water leaves behind. Skip it and your decal lifts at the edges within weeks.
2. Using the Wrong Pressure and Squeegee Technique
Correct pressure is firm and even, not hard. Too light and the adhesive never fully contacts the surface; too hard and you stretch the film, distorting your artwork.
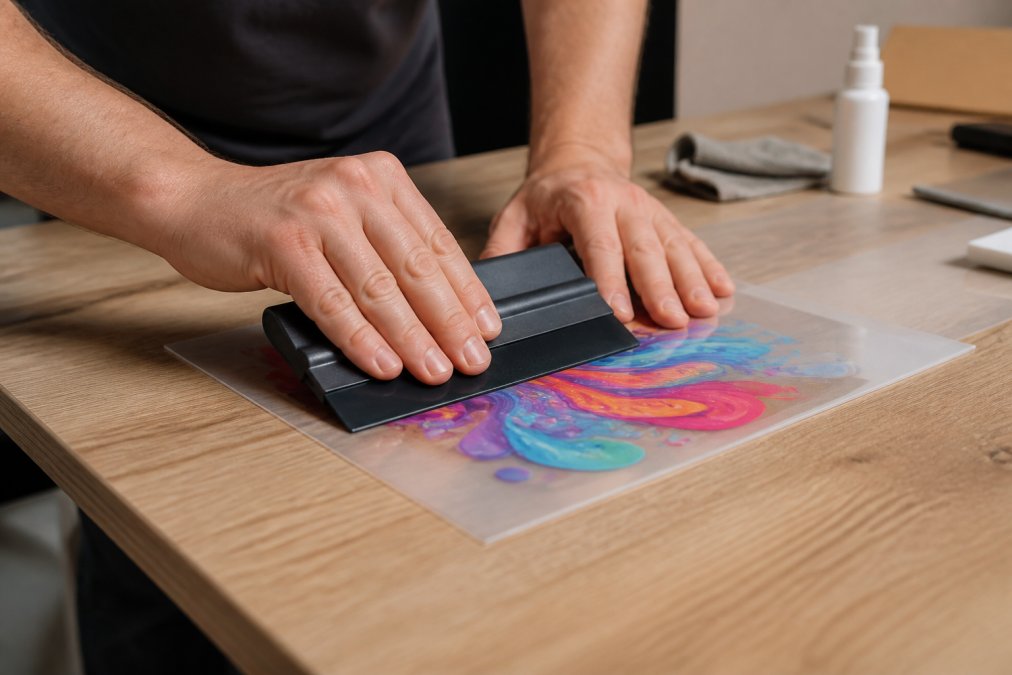
Here's the technique that works:
- Start from the centre of the design
- Push outward toward the edges in straight lines
- Overlap each pass by about half the squeegee width
- Use firm, steady strokes, not fast scrubbing
- Go over the whole design two or three times
Why Pressure Matters More Than Heat for UV DTF
This is where UV DTF and traditional DTF part company, and it's the biggest source of confusion for beginners.
- You cannot over-rely on heat to fix a weak press. With traditional DTF, a slightly light press is often rescued by a longer dwell time. With UV DTF, a light press is simply a failed press. There is no second chance once the film is off.
- Pressure needs to be consistent across the whole design. Heat presses apply even pressure by design; a hand squeegee does not, which is why overlapping strokes matter.
- Edges need the most attention. The centre usually presses down fine; the edges are where pressure drops off and lifting starts.
Reading the Film While You Work
You can tell whether your pressure is right before you peel, which saves wasted transfers.
- Uniformly dark, tight film: pressure is good and the adhesive has made full contact.
- Pale or silver patches: the adhesive has not touched down. Go back over them before peeling.
- Stretched film or distorted artwork: you pressed too hard and the transfer is likely unusable.
Squeegee Choice and Substrate Hardness
The right squeegee depends on the substrate.
- Flat, rigid surfaces such as glass, acrylic, and metal take a standard hard plastic squeegee with a felt edge to prevent scratching.
- Curved surfaces such as tumblers and bottles need a smaller or flexible edge to follow the curve. Work in short sections and overlap heavily.
- Soft or textured surfaces such as leather need lighter pressure and more passes. Pressing hard can leave a shine mark that will not come out.
3. Preventing Bubbles in UV DTF: The Application Mistake That Ruins Decals
Air bubbles form when trapped air has nowhere to escape, and a single bubble under a glossy decal catches light and draws the eye.
- Apply the transfer slowly, starting from one edge
- Use the squeegee in one direction, never back and forth
- Work from the centre outward every time
4. Peeling the Transfer Film Too Fast
Peel the top film slowly and at a low angle. Fast peeling is the fastest way to ruin an otherwise perfect application.
The correct method:
- Wait 30 to 60 seconds after pressing
- Lift one corner with your fingernail
- Pull back at a low angle, close to the surface
- Keep the motion slow and steady
5. Ignoring the Best Surfaces for UV DTF
UV DTF works on almost any hard surface, but the best surfaces share three traits: smooth, non-porous, and clean.
| Surface | Adhesion Quality | Best For |
|---|---|---|
| Glass and mirrors | Excellent | Tumblers, signage |
| Metal and stainless steel | Excellent | Bottles, promotional items |
| Hard plastic | Very good | Phone cases, containers |
| Acrylic | Very good | Displays, awards |
| Ceramics | Good | Mugs, tiles |
| Leather and faux leather | Moderate | Wallets, patches |
| Raw wood | Poor | Needs sealing first |
6. UV DTF Application Troubleshooting: Fixing Lifting Edges and Adhesion Issues
Lifting edges almost always trace back to poor surface prep, weak pressure, or insufficient curing time. UV DTF application troubleshooting starts with identifying which one you're dealing with.
7. Forgetting Post-Application Curing and Environmental Factors
UV DTF transfers need time to fully bond. Most people handle the item immediately and wonder why it fails later.
- Humidity: Damp air slows adhesive bonding. Work in a dry room where possible.
- Temperature: Cold surfaces stop adhesive from gripping. Let items reach room temperature first.
What Curing Actually Means for a Pressure-Sensitive Adhesive
With traditional DTF, curing is a chemical event: heat melts the adhesive powder into the fabric and it sets as it cools, so the bond is complete once the press opens.
Working Ranges for Temperature and Humidity
Most guides say "avoid humidity" and "avoid cold" without giving numbers. Practical working ranges most workshops find reliable:
- Room temperature: roughly 18-24°C. Below about 15°C the adhesive becomes noticeably less tacky and needs more pressure; above about 30°C it can become too soft and the film may slide.
- Relative humidity: roughly 40-60%. Above about 70%, moisture interferes with the adhesive's ability to wet out and you may see edge lifting even with correct technique. Below about 30%, static draws dust to the adhesive.
- Substrate temperature: this matters more than air temperature. A metal tumbler from a cold workshop feels fine to the hand but is cold enough to kill adhesion. Let substrates sit in the workroom at least an hour before applying, or warm them gently with a hairdryer on low and let them cool back to room temperature.
The Cure Window in Practice
- 0-30 minutes after application: leave the item flat and undisturbed. Do not stack, do not handle by the decorated area.
- 30 minutes to 24 hours: the item can be moved and stored, but avoid any pressure on the design, any washing, and any heat.
- 24-72 hours: the bond continues to strengthen. Full strength is generally reached somewhere in this window. If the item is going to be washed or used heavily, waiting the full 72 hours gives the best result.
- After 72 hours: normal use. Hand wash where possible, and keep the item out of dishwashers and away from direct heat.
Removal and Recovery: Fixing a Botched Application
Most guides stop at troubleshooting and never explain how to remove a transfer that has gone wrong, a failed application on an expensive substrate is not a write-off if you handle it correctly.
- Glass, metal, and hard plastic: warm the transfer gently with a hairdryer on a low setting. The adhesive softens, and you can lift an edge with a plastic scraper. Work slowly and keep the heat low. Once the film is off, remove any adhesive residue with isopropyl alcohol on a lint-free cloth.
- Acrylic: be more careful with heat, as acrylic can cloud or distort. Use warm water on a cloth to soften the adhesive rather than direct heat, and lift slowly.
- Leather and faux leather: avoid heat entirely. Peel slowly at a low angle and accept that some adhesive residue may remain. A small amount of residue is usually less noticeable than the damage heat would cause.
- Painted or coated surfaces: test in a hidden area first. Some coatings soften under isopropyl alcohol, and you do not want to trade a failed transfer for a ruined finish.
Conclusion
Applying UV DTF is straightforward once you know where the failures come from. Clean surfaces, firm pressure, slow peeling, and proper curing time solve most problems before they start.
Frequently Asked Questions
Why isn't my UV DTF transfer sticking to the surface?
The most common reason is inadequate surface preparation. Dust, oil, or moisture prevents the pressure-sensitive adhesive from bonding. Clean the surface thoroughly with isopropyl alcohol and let it dry completely before applying. Also, ensure you apply firm, even pressure with a squeegee, as insufficient pressure is another frequent cause of adhesion failure. For best results, apply to smooth, rigid surfaces and avoid touching the adhesive side of the transfer film.
How do I ensure a bubble-free UV DTF application?
Preventing bubbles in UV DTF starts with a clean, smooth surface. Apply the transfer using a squeegee, working from the centre outward in overlapping strokes to push air out. Peel the top film slowly and at a low angle. If bubbles appear, use a pin to prick them and press down. For the best results, use a UV DTF gang sheet from a quality supplier and avoid applying transfers in dusty or humid environments, as these can introduce contamination.
What surfaces are suitable for UV DTF application?
UV DTF transfers work best on smooth, rigid, and non-porous surfaces. The best surfaces for UV DTF include glass, metal, hard plastic, acrylic, wood, leather, and ceramics. They are ideal for custom tumblers, phone cases, and promotional products. Avoid flexible or heavily textured surfaces, as the transfer may not adhere properly. Always test on a small area first if you are unsure about compatibility.
What is the expected lifespan of a UV DTF sticker?
A properly applied UV DTF transfer can last for years with correct care. The print is waterproof, scratch-resistant, and weather-resistant. However, exposure to harsh conditions like dishwasher cycles, microwaving, or abrasive cleaners will reduce its lifespan. To maximise durability, hand wash decorated items and avoid high heat. Using a quality UV DTF gang sheet from a trusted supplier like BB5wholesale also ensures better longevity.