


5 Best Surfaces for UV DTF Transfers: 2026 Guide

Table of Contents
- Quick Comparison: The 5 Best Surfaces for UV DTF Transfers
- 1. Ceramic and Tumbler Surfaces
- 2. Glass and Mirrors
- 3. Stainless Steel and Metal
- 4. Acrylic and Hard Plastics
- 5. Sealed Wood and Leather
- Preparing Surfaces for UV DTF: A Step-by-Step Guide
- Troubleshooting UV DTF Adhesion Issues
- Frequently Asked Questions
Last Updated: September 17, 2026
Quick Comparison: The 5 Best Surfaces for UV DTF Transfers
UV DTF transfers are pressure-applied decals that bond to hard, non-porous surfaces using UV-cured ink and a protective varnish, with no heat press required. The five best surfaces are ceramic and tumblers, glass and mirrors, stainless steel and metal, acrylic and hard plastics, and sealed wood and leather.
Here's how they compare at a glance:
| Surface | Adhesion | Best For | Watch Out For |
|---|---|---|---|
| Ceramic & tumblers | Excellent | Drinkware, mugs, promotional gifts | No dishwasher or microwave use |
| Glass & mirrors | Excellent | Home décor, signage, mirrors | Fingerprints show during alignment |
| Stainless steel & metal | Very good | Bottles, flasks, tech accessories | Curved surfaces need extra pressure |
| Acrylic & hard plastics | Good | Phone cases, displays, retail signage | Static attracts dust before application |
| Sealed wood & leather | Good | Keepsakes, journals, bags | Unsealed grain absorbs adhesive poorly |
This guide from BB5wholesale walks through each surface in detail, then covers preparation, curing, and the adhesion problems that catch most people out. Get the surface right and a UV DTF decal can stay put for years.
1. Ceramic and Tumbler Surfaces
Ceramic and tumblers are the best surfaces for UV DTF transfers overall: their smooth, non-porous glaze gives UV ink and protective varnish a near-perfect surface to grip.
The glossy finish means there's no grain or texture for the adhesive to fight against, and a firm squeegee pass creates a permanent bond that handles daily use without edge lifting.
Where ceramic tumbles is heat. A UV DTF transfer on a ceramic mug looks factory-printed, but a dishwasher cycle will slowly break down the bond. Hand-washing keeps the finish intact far longer.
- Best for: drinkware, mugs, promotional gifts, personalised tumblers
- Avoid: dishwasher cycles, microwaving decorated items, abrasive sponges
- Insider tip: leave a decorated tumbler for 24 hours before first use so the adhesive fully settles
2. Glass and Mirrors
Glass and mirrors deliver the cleanest, most vibrant result of any surface: light passes through the glass and reflects back through the UV ink, intensifying colour.
That's why glass is the go-to for decorative signage, café window graphics, and mirrored home décor, a UV DTF decal sits almost invisibly on it, with no visible film edge from a normal viewing distance.
The catch is handling. Glass shows every fingerprint, so alignment marks and smudges need wiping before you lay the transfer down. Work in good light and keep a microfibre cloth nearby.
- Best for: mirrors, window signage, home décor, glassware
- Avoid: greasy or dusty glass, which kills adhesion before the transfer even touches it
- Insider tip: clean glass with isopropyl alcohol, not a household spray, so no residue film is left behind
3. Stainless Steel and Metal
Stainless steel and metal are the workhorses for business branding: UV DTF decals bond firmly to powder-coated flasks, water bottles, and metal tech accessories.
Metal is rigid and dimensionally stable, which suits a permanent bond well, a UV DTF transfer on a stainless steel bottle won't stretch or shift the way a decal on a flexible surface might.
The one variable is curvature. A flat metal panel is straightforward; a slim water bottle needs steady, overlapping squeegee pressure to push the adhesive into every curve. Skipping that step is the most common cause of edge lifting on metal.
- Best for: flasks, bottles, branded merchandise, metal signage
- Avoid: hot metal surfaces, which soften the adhesive during application
- Insider tip: on curved metal, work the squeegee from the centre outwards in short strokes
4. Acrylic and Hard Plastics
Acrylic and hard plastics are the most versatile surface for UV DTF transfers, covering everything from phone cases to retail display stands and point-of-sale signage.
Acrylic holds sharp detail and bright colour on a smooth, rigid substrate, a fast route to a professional finish without a heat press for small businesses selling customised phone cases, keyrings, or signage.
Why acrylic bonds so well, and where it doesn't. Adhesion depends on surface energy: the adhesive needs a substrate with higher surface energy than itself to 'wet out' and grip. Acrylic, polycarbonate, rigid PVC and ABS all sit above that threshold, so a squeegeed decal bites almost immediately. The exception is low-surface-energy plastics such as polypropylene (PP) and polyethylene (PE), recycling codes 5 and 2, common in cheap storage boxes and some promotional items.
- Best for: phone cases, keyrings, retail displays, acrylic signage
- Avoid: PP and PE plastics (recycling codes 5 and 2), dusty workshops, dry staticky environments, acetone-based cleaners
- Insider tip: peel the protective B film slowly at a low angle to avoid pulling the design with it, and leave thin plastics 48 hours before flexing
5. Sealed Wood and Leather
Sealed wood and leather work well with UV DTF transfers, but only when a clear coat, varnish, or factory finish closes the grain.
-
Humidity: apply below roughly 60% relative humidity. In damp air, sealed wood can carry a thin film of moisture that stops the adhesive wetting out, and leather can swell. A dehumidifier or a dry indoor day solves this.
-
Temperature: keep the surface and room above roughly 15°C. Cold surfaces slow the adhesive's flow and make the varnish tacky rather than smooth. Below that, warm the item gently and let it return to room temperature before pressing.
-
Curing time: allow 24 hours at room temperature, and 48 hours on leather goods that flex, such as bags and wallets. Leather keeps moving with use, so a longer cure lets the adhesive reach full strength before handling.
-
Best for: coasters, journals, bags, keepsake boxes, leather accessories
-
Avoid: raw, oiled, or waxed wood that hasn't fully cured; aniline or unfinished leather; humid or cold application conditions
-
Insider tip: on leather, apply to a flat panel rather than a seam or fold, and leave 48 hours before the item is carried or flexed
Preparing Surfaces for UV DTF: A Step-by-Step Guide
Preparation decides whether your UV DTF transfers last five months or five years. Surface tension, not pressure, is the real variable: a clean, dry, non-porous surface lets the adhesive wet out evenly, while oil or dust creates a barrier the varnish can't cross.
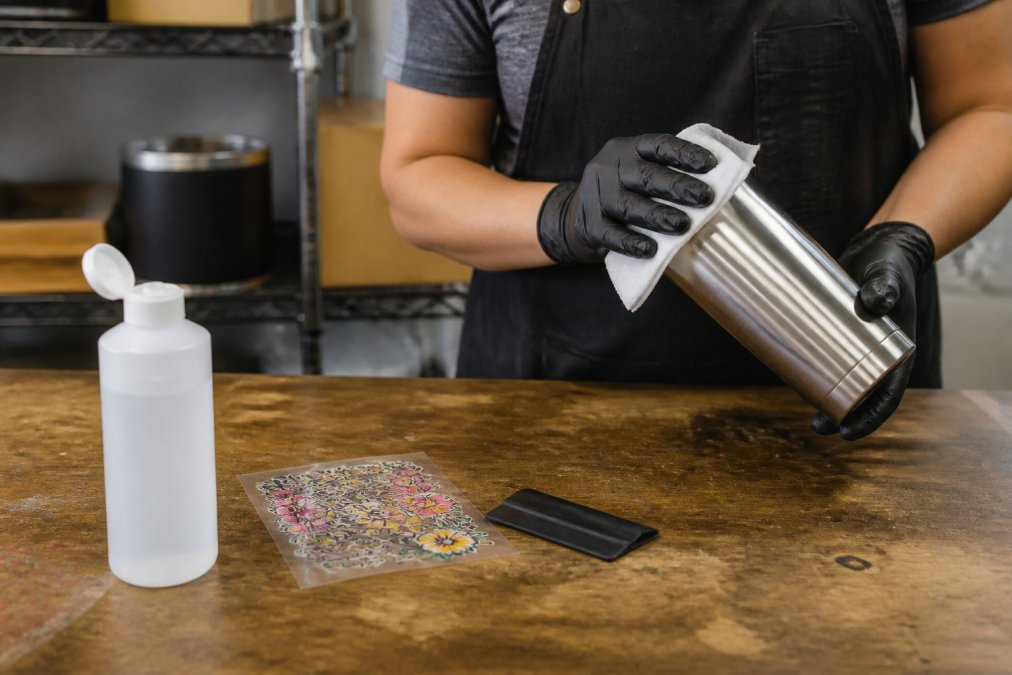
Follow these steps every time:
- Clean the surface with isopropyl alcohol and a lint-free cloth. Let it air-dry fully.
- Check for texture. Run a fingernail across the surface. If it catches, the surface is porous and needs sealing first.
- Position the decal and mark alignment with low-tack tape before committing.
- Peel the backing film and lay the transfer down, working from one edge to avoid trapped air.
- Press firmly with a squeegee, overlapping each stroke and paying extra attention to edges and curves.
- Remove the top film slowly at a low angle, holding the design flat against the surface.
- Leave it to cure for 24 hours before washing, handling, or packing.
Troubleshooting UV DTF Adhesion Issues
Most UV DTF adhesion issues come down to four causes: a dirty surface, a porous substrate, insufficient application pressure, or removing the top film too fast. Work through the symptoms below before assuming the transfer is faulty.
| Problem | Likely Cause | Fix |
|---|---|---|
| Edges lift after a day | Not enough squeegee pressure at edges | Re-press edges firmly, then cure 24 hours |
| Bubbles under the design | Trapped air from centre-out application | Peel back, re-lay from one edge |
| Design tears on peel | Top film removed too fast or at a steep angle | Slow down, peel at a low angle |
| Patchy, weak bond | Oily, dusty, or porous surface | Re-clean with isopropyl alcohol or seal first |
| Fades after washing | Dishwasher or harsh detergent exposure | Hand-wash only, avoid soaking |
Frequently Asked Questions
What surfaces can you put UV DTF transfers on?
UV DTF transfers bond best to non-porous, smooth surfaces. The top five are ceramic and tumblers, glass and mirrors, stainless steel and metal, acrylic and hard plastics, and sealed wood or leather. Each holds a permanent bond when cleaned with isopropyl alcohol and pressed firmly with a squeegee. Porous or heavily textured surfaces need sealing first.
Do UV DTF stickers work on porous surfaces like wood?
Raw, unsealed wood is not ideal because the UV DTF adhesive needs a smooth surface to form a permanent bond. If you want to decorate wood, apply a clear sealant or varnish first and let it cure fully. Sealed wood then behaves like a hard, non-porous substrate and holds the decal well. Always test a small area before a full production run.
How do I ensure long-lasting adhesion for UV DTF transfers?
Start by cleaning the surface with isopropyl alcohol to remove oils and dust. Press the decal firmly with a squeegee, working from the centre outwards to push out air bubbles. Peel the transfer film slowly at a low angle. For UV DTF application best practices, avoid washing decorated items in a dishwasher and keep them away from high heat, which can weaken the bond over time.
Are there any surfaces that are unsuitable for UV DTF?
Yes. Raw unsealed wood, rough-textured fabrics, silicone, and heavily curved or flexible surfaces are unsuitable because the adhesive cannot form a permanent bond. Very small, highly curved items like some phone cases may need a different approach. If you are troubleshooting UV DTF adhesion issues, the surface is almost always the first thing to check before blaming the transfer itself.